
In this short tutorial we will learn how to digitize trails from existing heritage maps using QGIS. We will use a Survey of India map in this example. First you will need to geo-reference your existing map as explained over here.
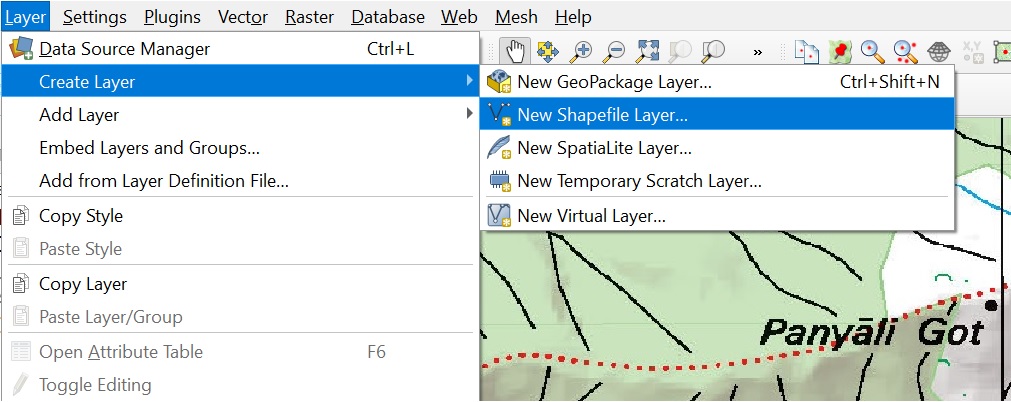
Next, you will have to create a new Shapefile layer in QGIS to add the digitized trails. Go to menu Layer – Create Layer – New Shapefile Layer
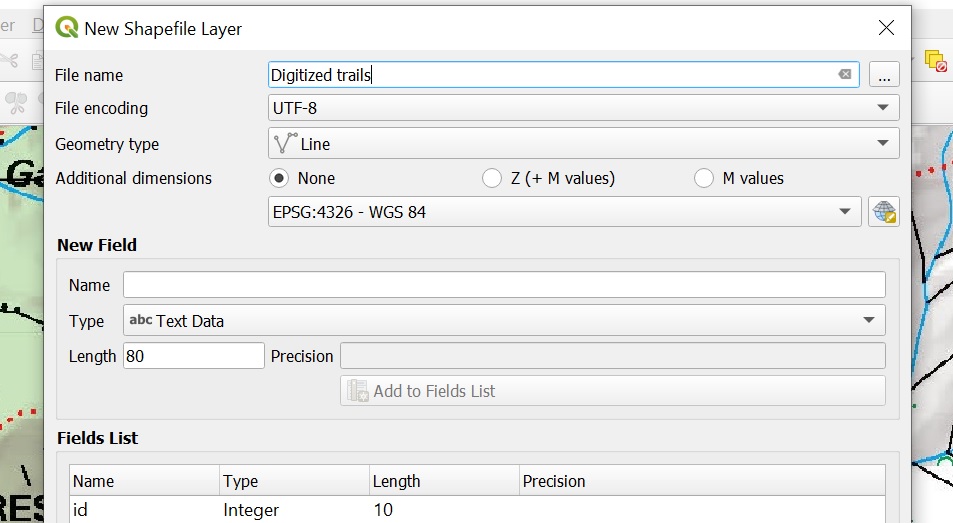
Give a name to your layer, choose Geometry type as “Line”. No need to add more fields to the layer. Click OK to add the new layer to your QGIS Layers pane:
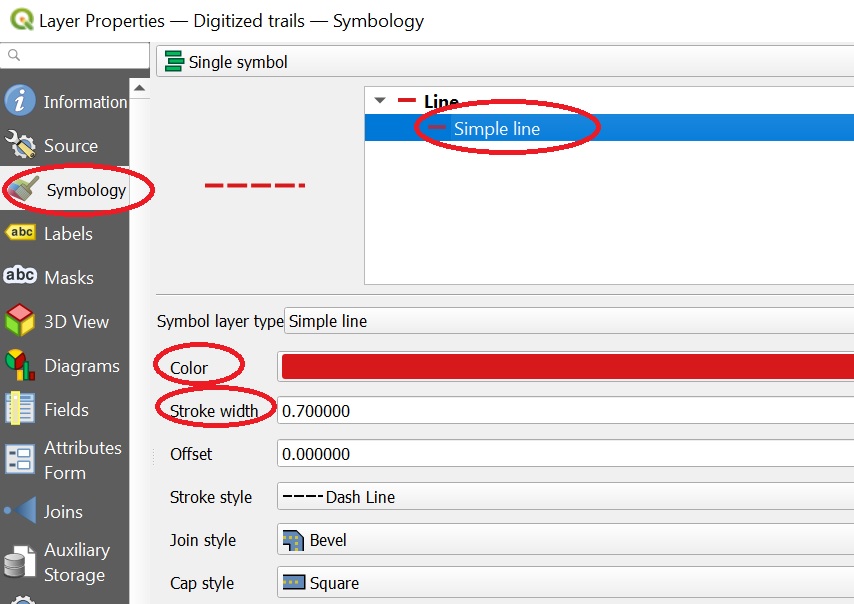
Next right click the newly created layer in the Layers pane and choose Properties. Go to Symbology and set a bright color (e.g. red), stroke width (at least 0.5) and style:
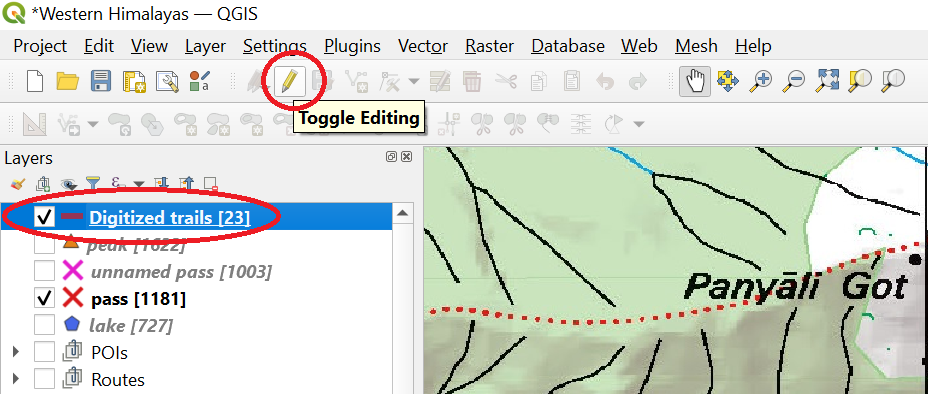
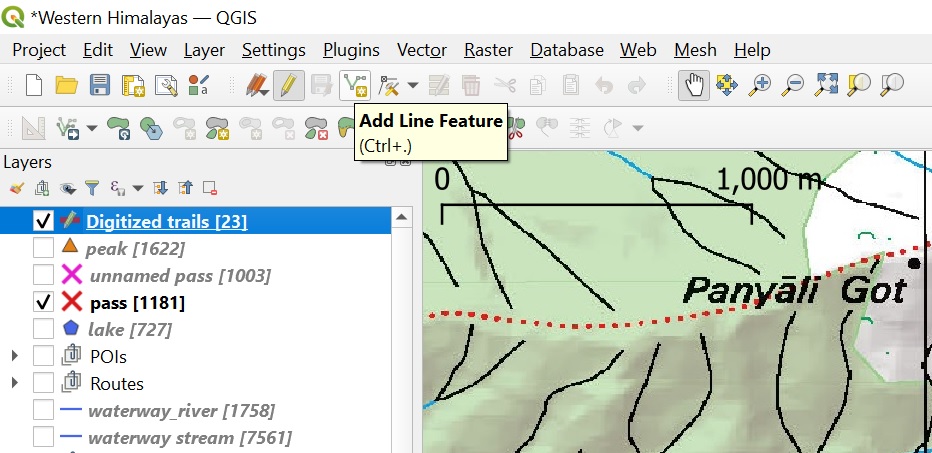
We are ready to start digitizing trails now. Select the layer in the Layers panel and click the Toggle Edit icon on the toolbar to enable editing of the layer:
Next, click the “Add Line Feature” icon on the toolbar to start digitizing new trails on your geo-referenced map. Ensure to digitize at a reasonably high zoom level (maximum 1:10K scale) in order to do so accurately! Each difference on the map in QGIS can correspond to hundred(s) of meter(s) in the field.
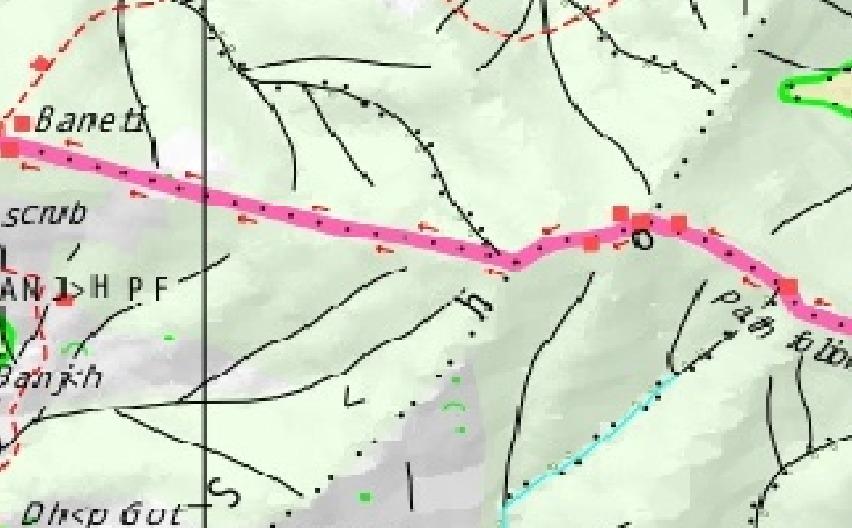
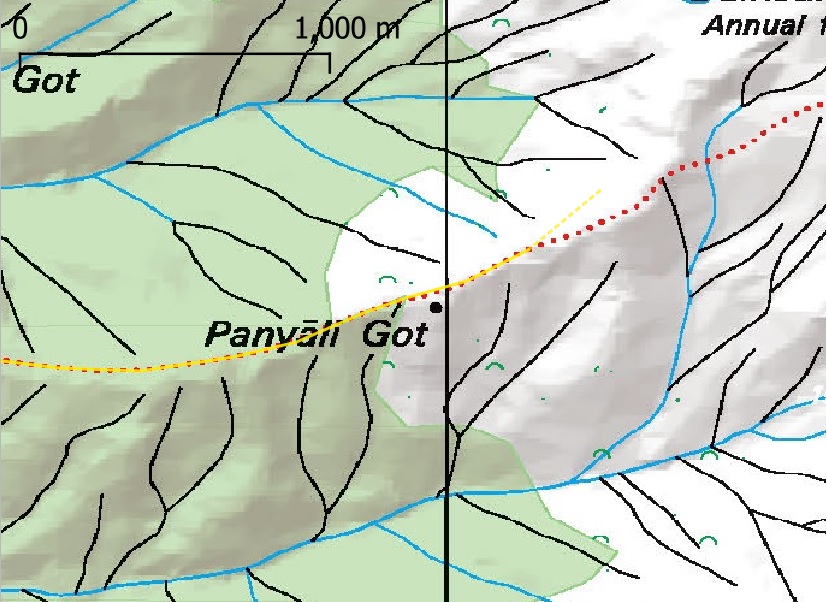
On Survey of India maps hiking routes are marked in various ways: red dotted lines for basic trails and red dashed lines for wider (rock) paths:
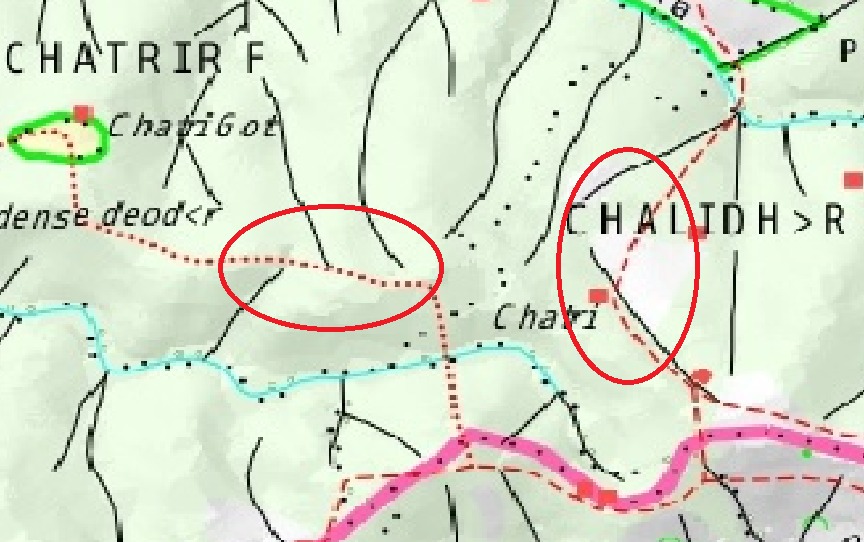
Hiking routes following other features like geo-political boundaries or streams are marked with red arrows:
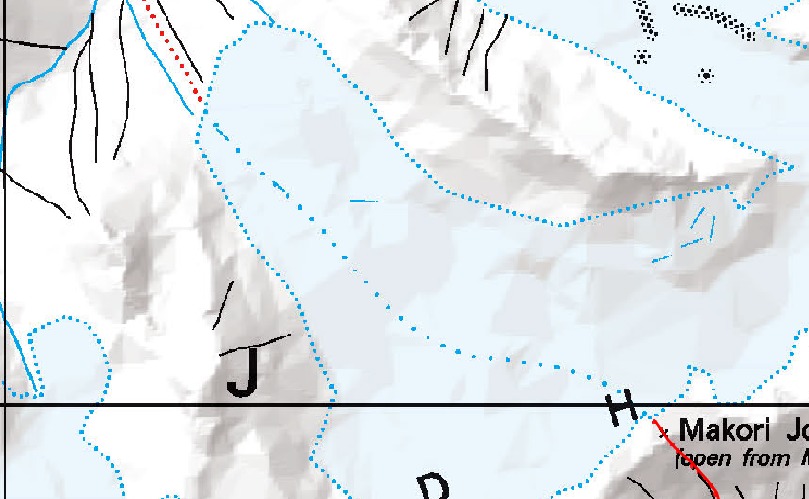
Hiking routes crossing glaciers will be marked by blue dotted lines:
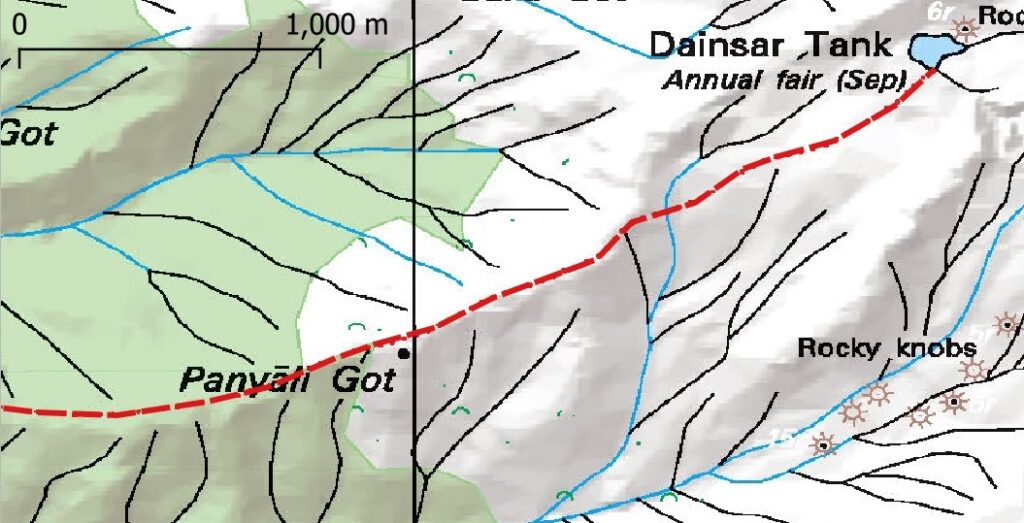
You can now trace / digitize the trails on the geo-referenced bitmap by clicking individual points:
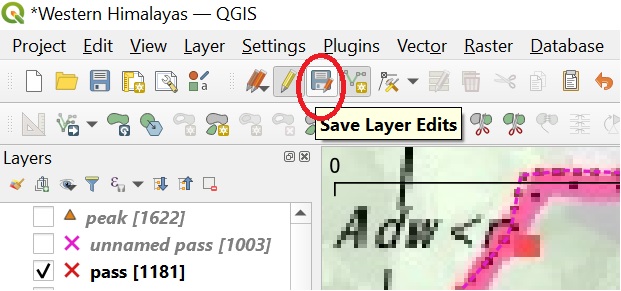
Ensure to periodically click “Save Layer Edits” icon on the toolbar in order to save your digitization work. Sometimes QGIS might crash and you will lose all your changes:
After completing one trail on the map, right click to complete the digitized trail and press OK to add the digitized trail to your shapefile layer. It will be shown in the color, width and stroke selected earlier above:
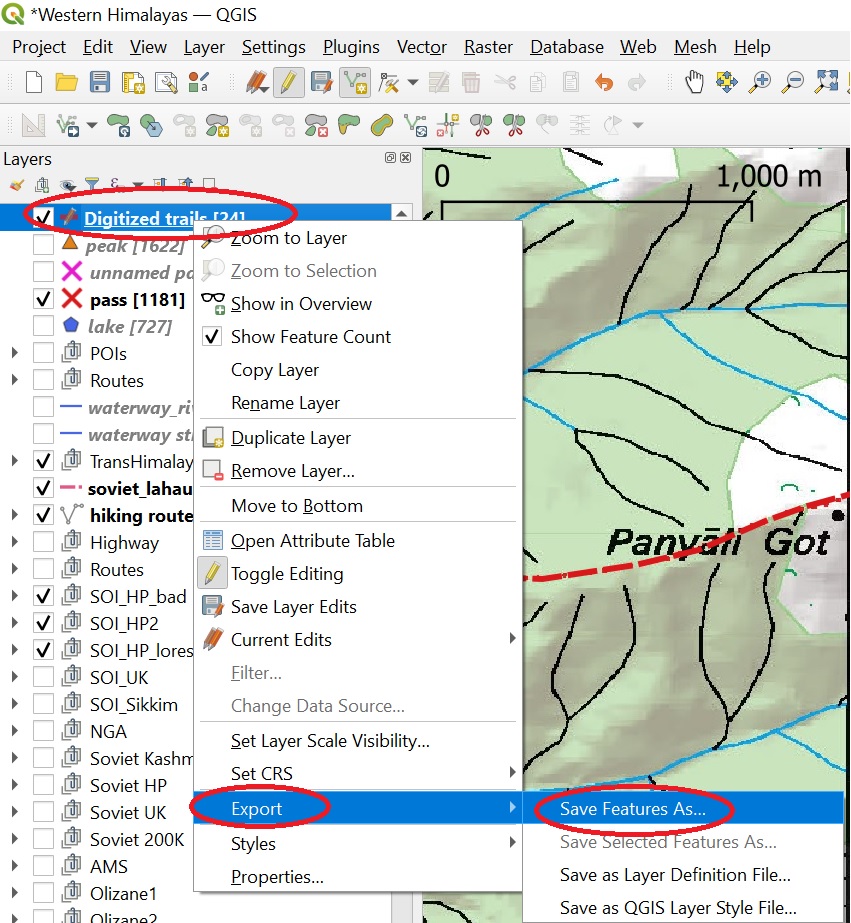
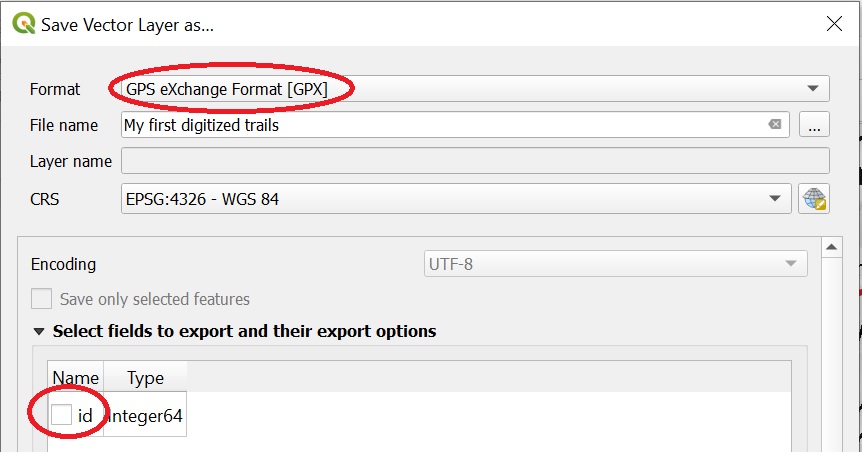
Repeat the same for other trails on your geo-referenced map until complete. The final step now is to export the digitized trails in a GPX file which can be loaded in any mobile app used for navigation in the field. Right click your shapefile layer and choose Export – Save Features As:
Choose Format “GPS eXchange Format”, give a proper name to your GPX file and uncheck the default ID field (not supported in GPX format), press OK:
You can now download the GPX file in any mobile navigation app on your phone to explore the digitized trail in the field. Here, showing the same in OSMAnd:
Congratulations! You are now ready to explore any trail documented on any legacy map by geo-referencing the map and digitizing the trails as per above.
Appendix – adding an OSM base layer to QGIS
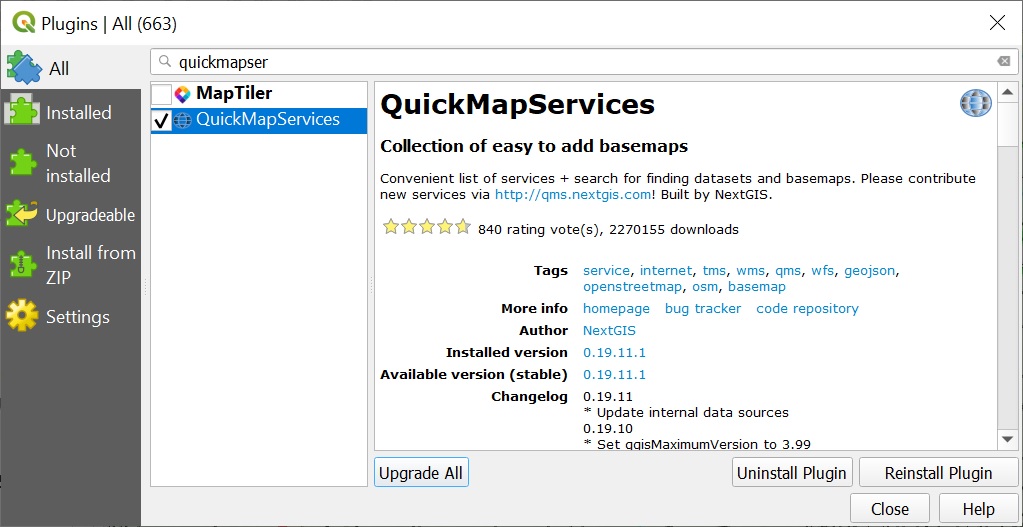
In general, it’s useful to add a base map to your QGIS project as a reference while geo-referencing maps or digitizing features. Below a short tutorial on how to quickly add any of the many available map sources. First install the “QuickMapServices” QGIS plugin:
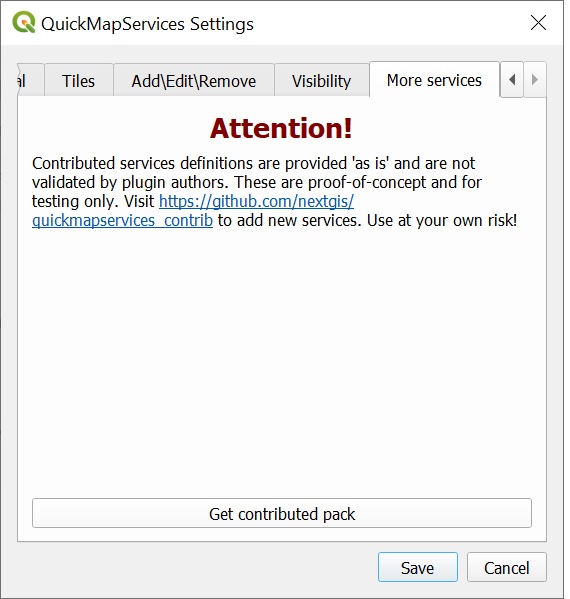
Next, go to the main QGIS menu Web – QuickMapServices – Settings. Select the “More Services” tab and click “Get contributed Pack” to download additional map services:
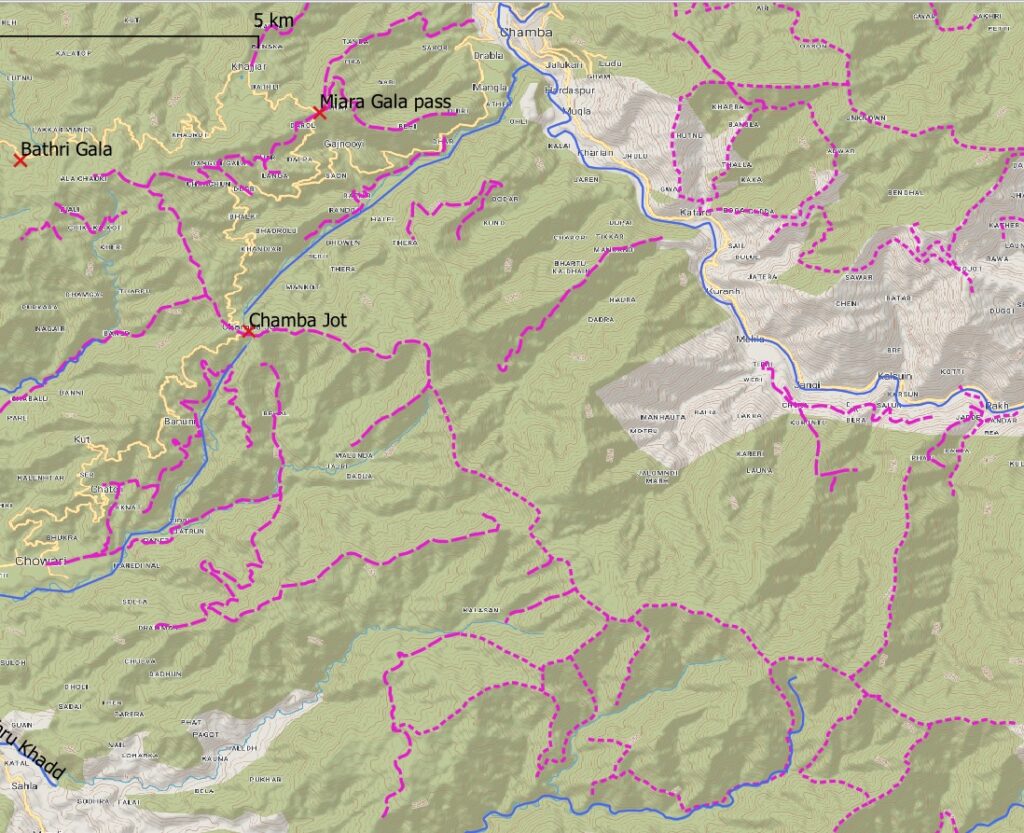
You can now add any map below as a base layer to your QGIS project: I generally use OpenTopoMap:

You can now view your digitized features on top of an OpenTopoMap (Satellite map…) base layer:
The basemap layer is also useful to cross check if external maps are properly geo-referenced by comparing the location of valleys, rivers, streams, peaks on the geo-referenced map vs. the base layer map.