

In part 3 we will start planning Himalayan traverses via continuous hiking routes across multiple mountain passes planning for in-between food supply in nearby settlements and night halt in camp sites and shelters.
Contents
- Human settlements
- Shelters & campsites
- A simple traverse
- OSM Place Search plugin
- Identifying POIs
- Visualisation
- Exporting to phone
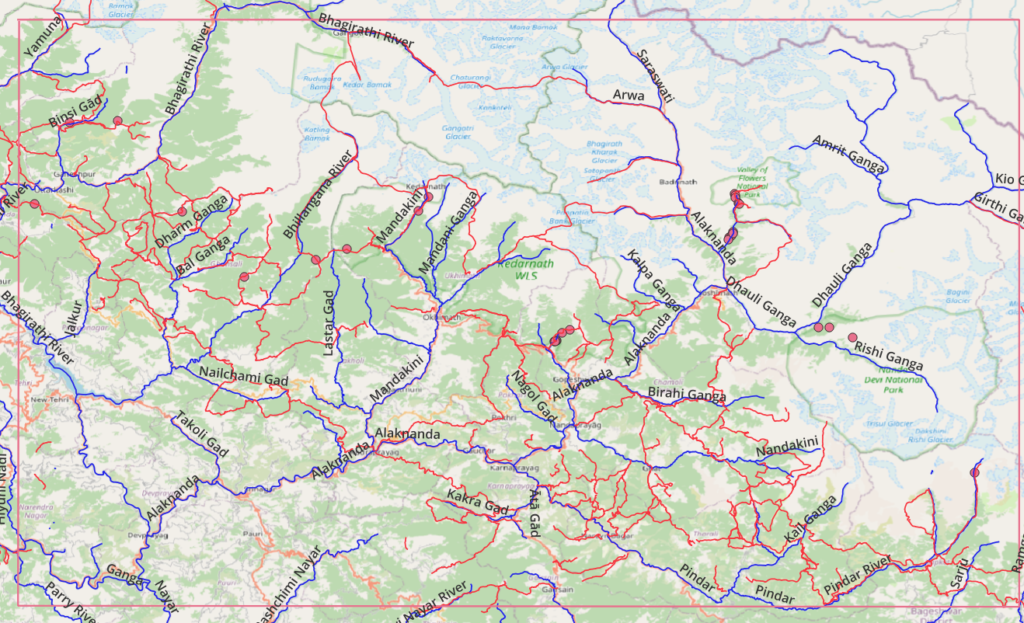
Settlements
Centre your map window at (30.52, 79.2), scale 1:500K or use this window extent. Settlements are useful base points for the alpine style hiker for night halt, food supply, recharging electronics and guidance. We can download the same from OSM using “place=village” (major), “place=hamlet” (minor), “place=isolated_dwelling” (seasonal summer). As per JOSM convention color them red / yellow / green respectively.
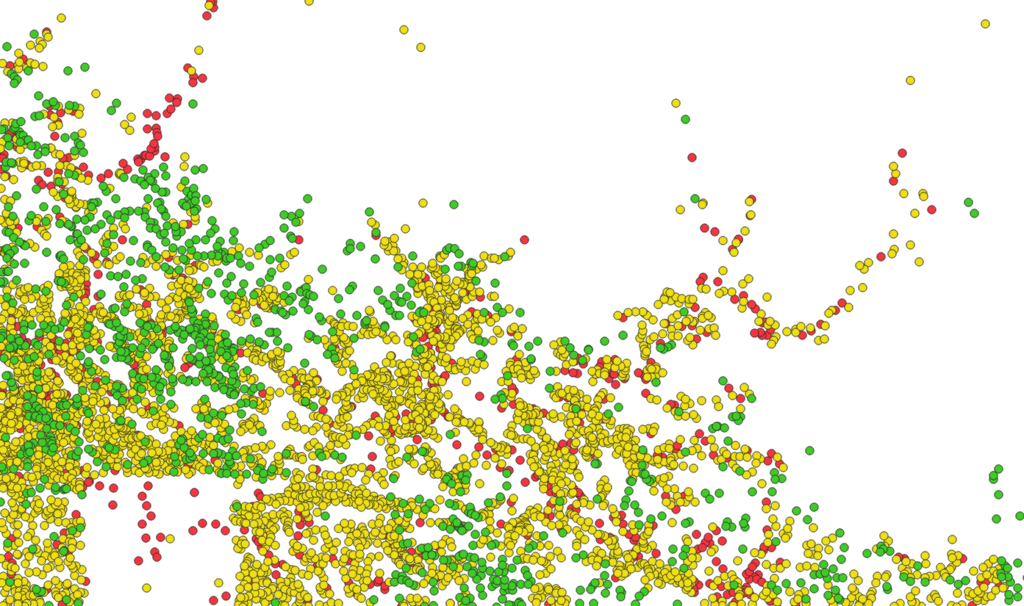
Human settlements are high density data so best viewed at smaller scales for individual hiking routes.
Overlaying the geography (valleys) we see that most human settlements are in lower altitude valleys (warmer, abundant water, less winter snow) except for the seasonal dwellings which are higher up closer to the meadows where locals graze their cattle during the summer
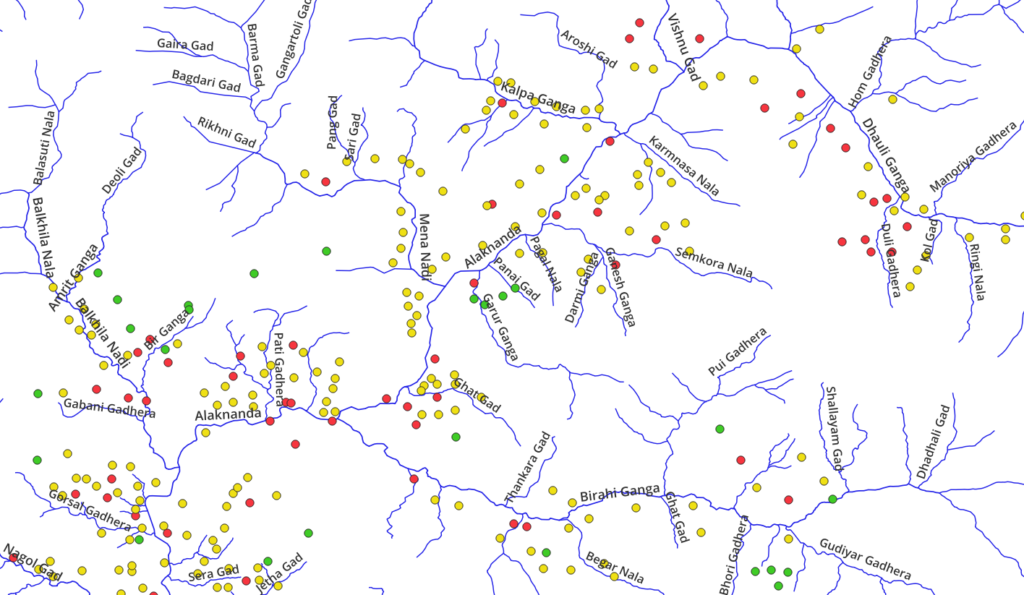
Overlaying the OSM hiking routes + human settlements allows us to plan for night halt and food supply along the way

Night Halt
Center your map window at (30.52, 79.2), scale 1:500K or use this window extent. In addition to human settlements we can also look for natural shelters and campsites for night halt on multi-day hikes.Run the queries “tourism=camp_site” and “amenity=shelter” to bring up the same
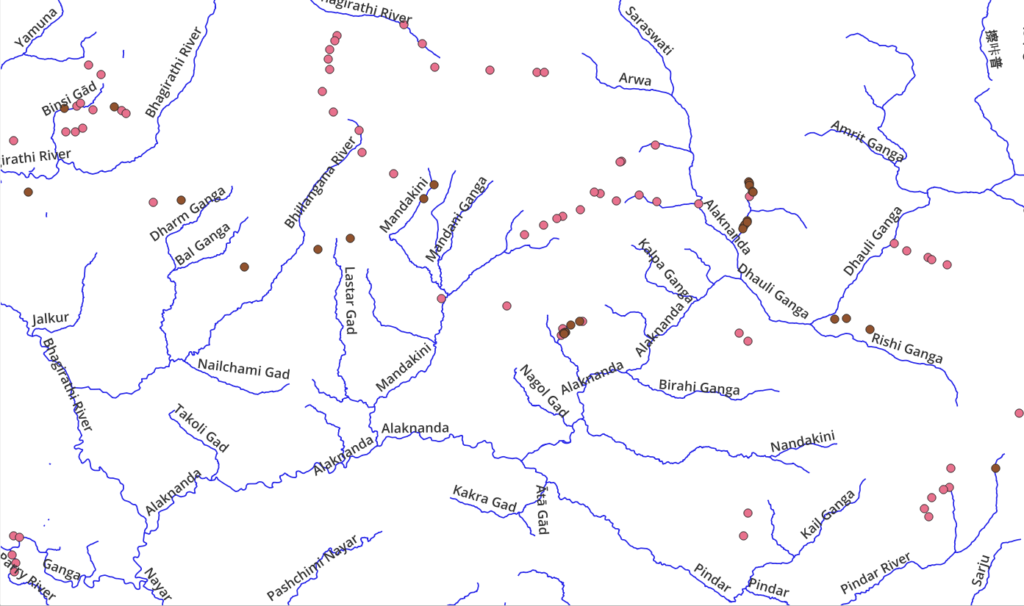
Zooming into individual hiking route we now can plan various night halts along higher altitude multi-day traverses

A Simple Traverse
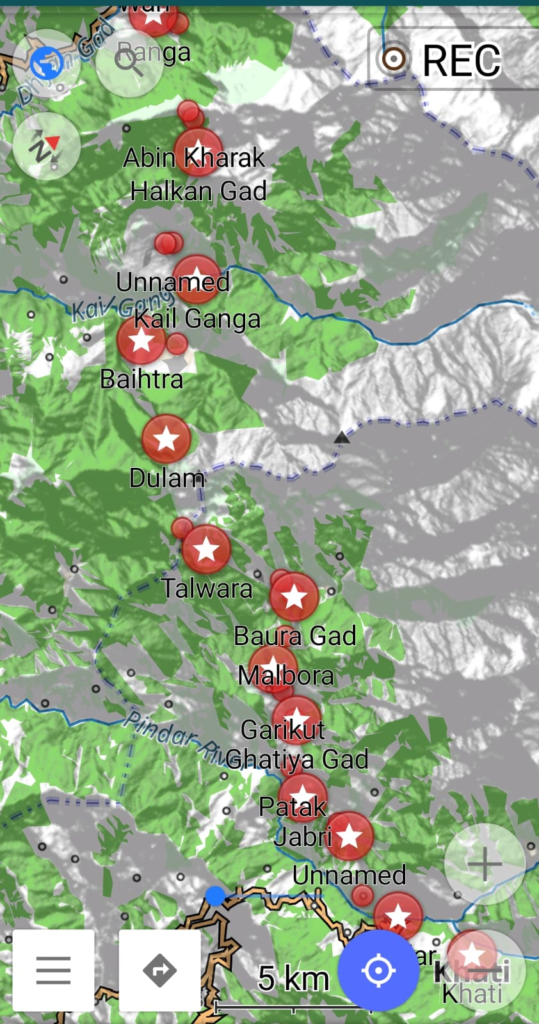
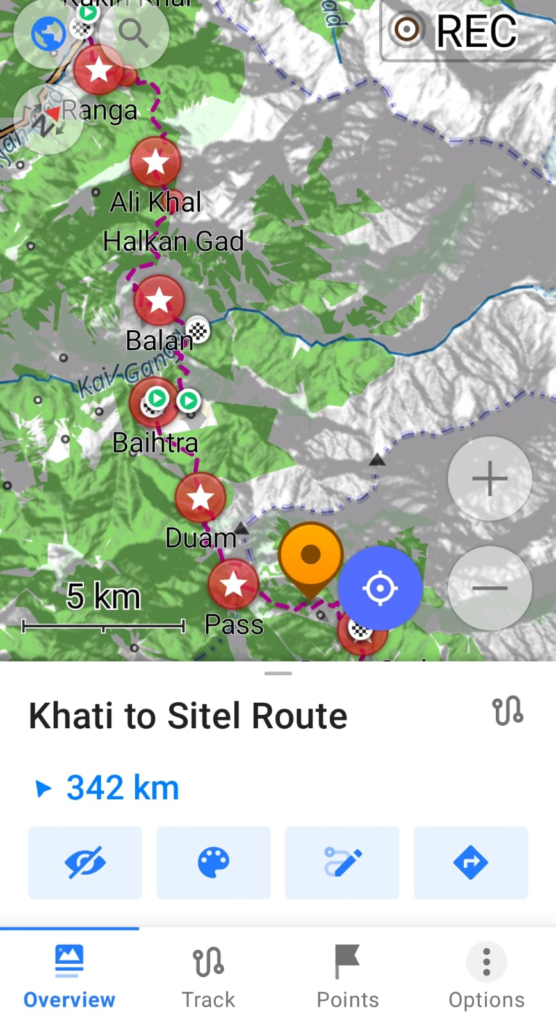
Let’s now plan a simple multi-day traverse across several mid-altitude passes planning night halt and food supply. Let’s say we wish to traverse from Khati village in the Pindari river valley to Sitel village in the Nandakini river valley (read further below how to locate places in QGIS).
Center you window around (30.19, 79.75) at 1:125K scale. There s a connected sequence of OSM hiking routes from bottom right to top level that takes us across the following Himalayan geography:
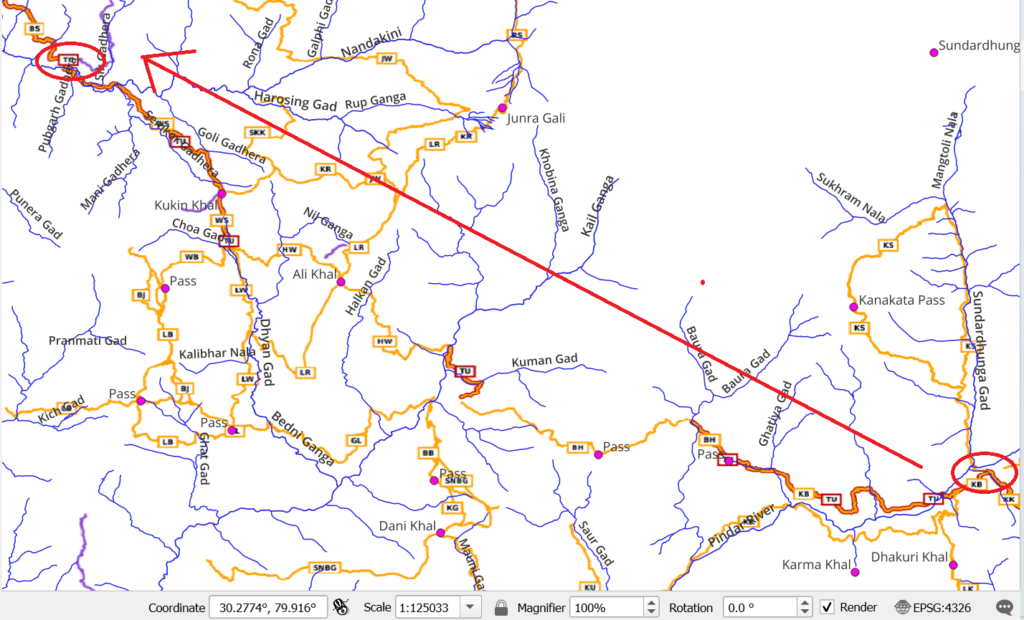
- Pindar river valley
- Unnamed valley
- Ghatlya Gad
- Baura Gad
- Unnamed pass
- Unnamed pass
- Kail Ganga
- Halkan Gad
- Ali Khal pass
- Dhyan Gad
- Kukin Khal pass
- Semkor Gadhera
- Nandakini river valley
Identifying POIs
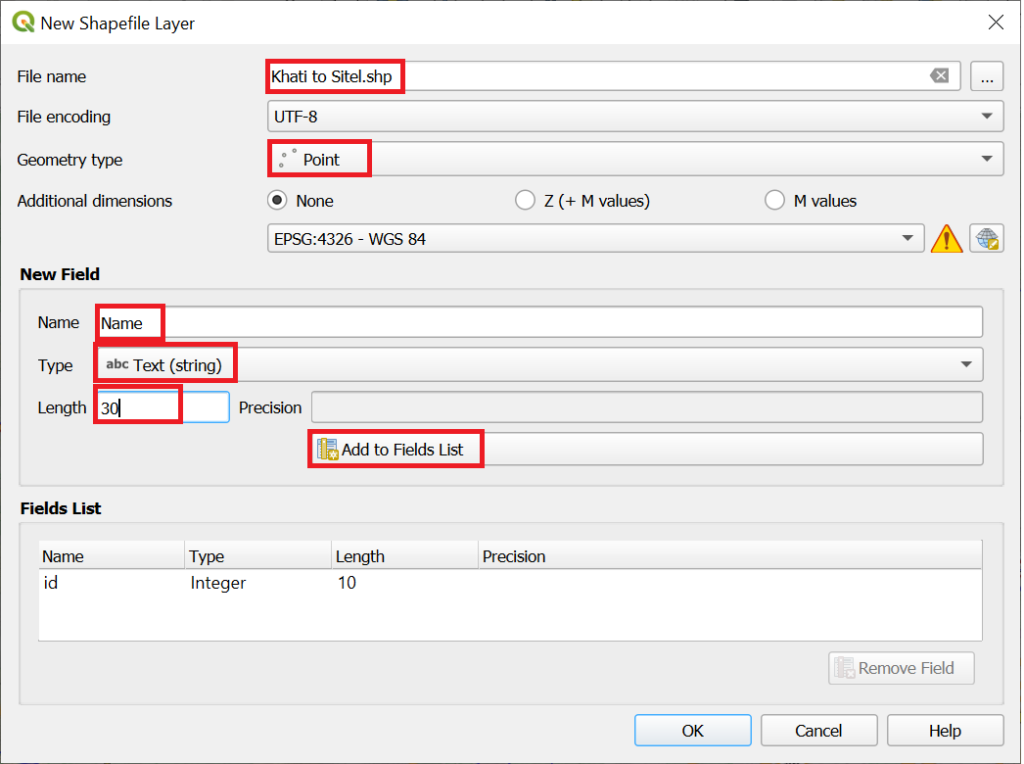
Let’s create a new point vector layer to store all intermediate points of interest (POI) which are important for the hiker.
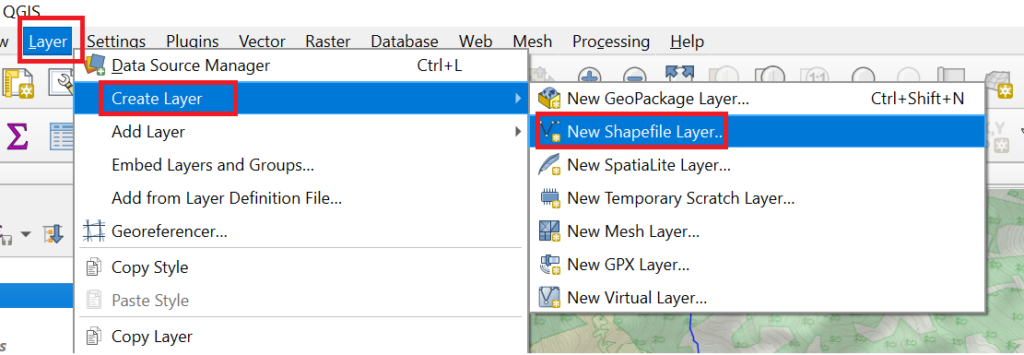
Give it a proper name, select “Geometry type=Point”, remove the default “id” attribute and add two new fields:
- “name” text field, length=30. Important – use lower case “name” (more on this below)
- “type” text field, length=30
Select the new point layer, click “Toggle Edit” icon on toolbar and choose “Add Point Feature” icon to start adding POIs to your layer.

We can easily locate any OSM item in QGIS using the OSM place search plug-in. Search for and mark the starting Khati and ending Sitel villages


Now start marking all useful POIs along the hiking route – stream crossings, mountain passes, villages, hamlets and dwellings.
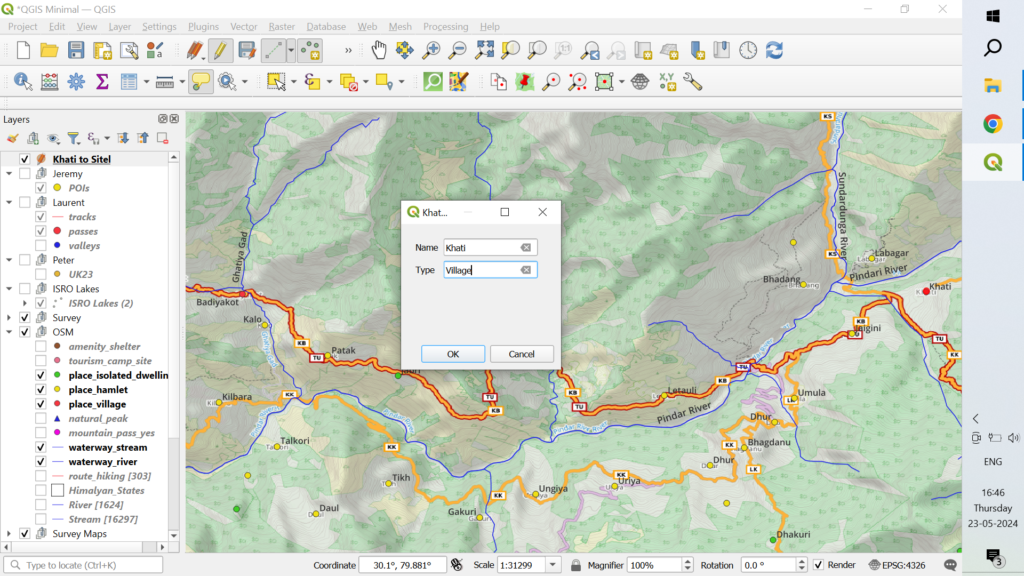
Around 20 POIs can be identified along this multi-day traverse:

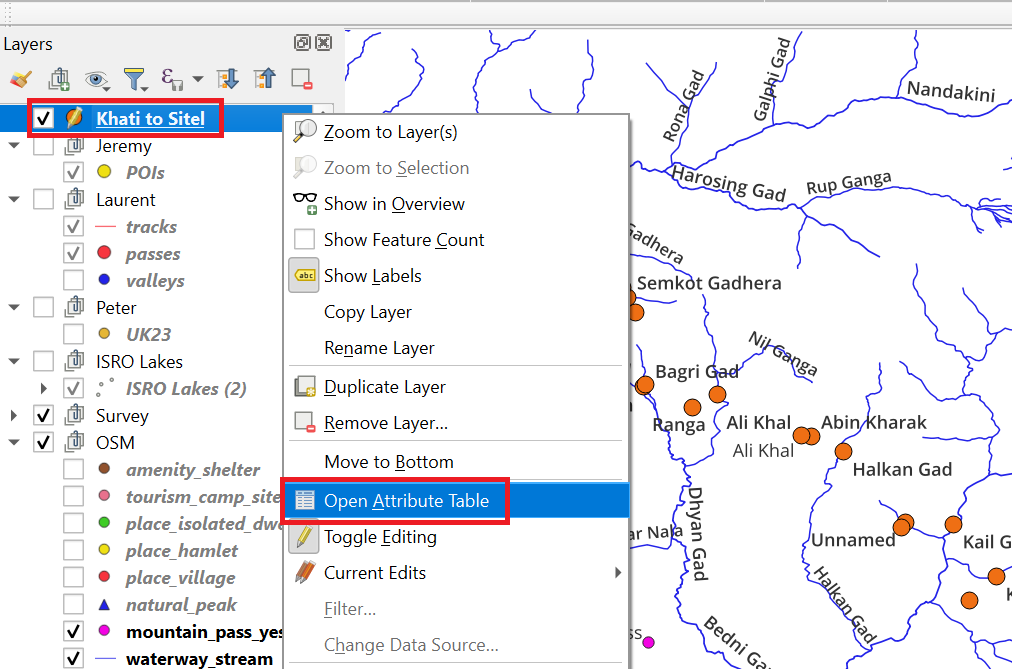
Right click on the layer and open the “Attribute Table” to see the same POIs in a tabular list

Visualization
We can visualize the different types of POIs using different colors and symbols in the Symbology tab of the point layer
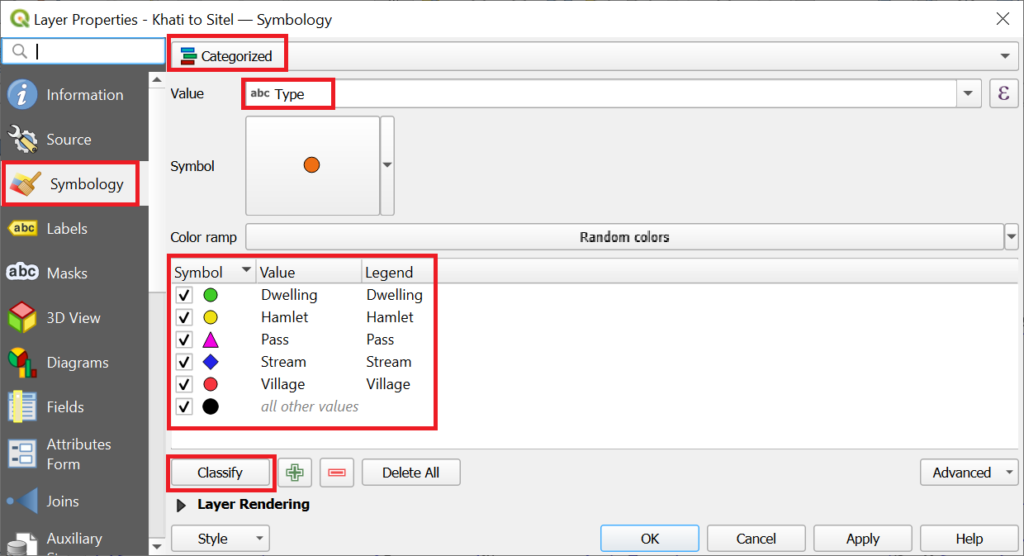


Overlaying on a topographic map we can easily plan:
- Mountain passes (high points)
- Stream crossings (drinking water)
- Villages, hamlets (food supply, night halt)
- Dwellings (night halt)

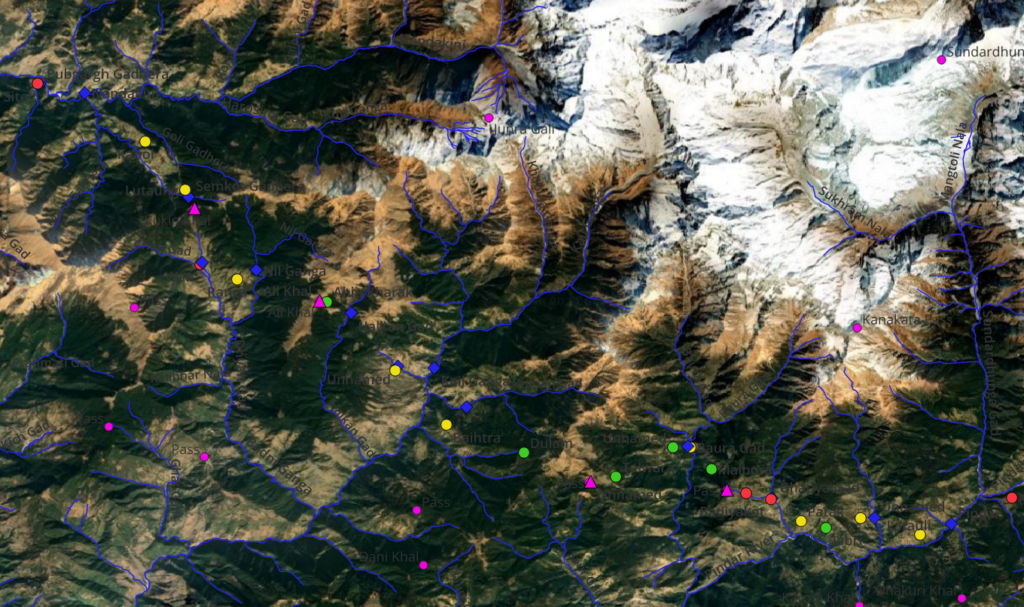
Additional detail on terrain features, alternate trails and remote settlements can be identified using the Survey maps and satellite maps


Navigation
Final step is to export the POIs to a GPX file which can be downloaded in your phone or watch for navigation
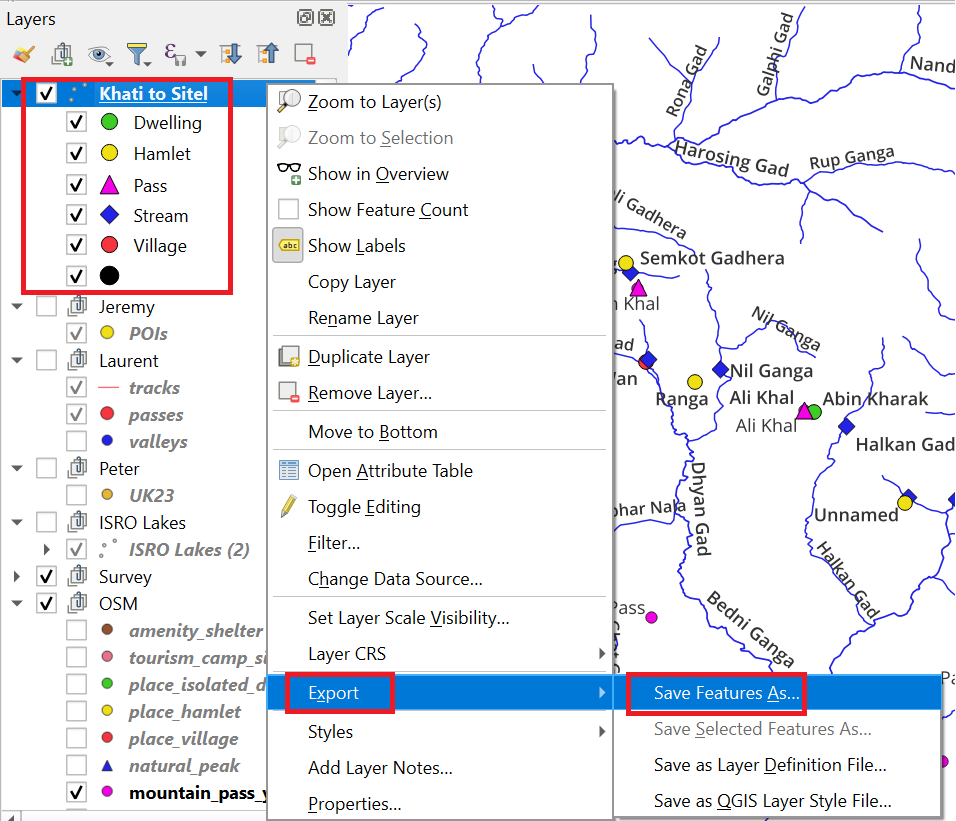
Select only “name” field (supported in GPX) and uncheck “id” (unsupported). Ensure to save “…” in a directory with write access.
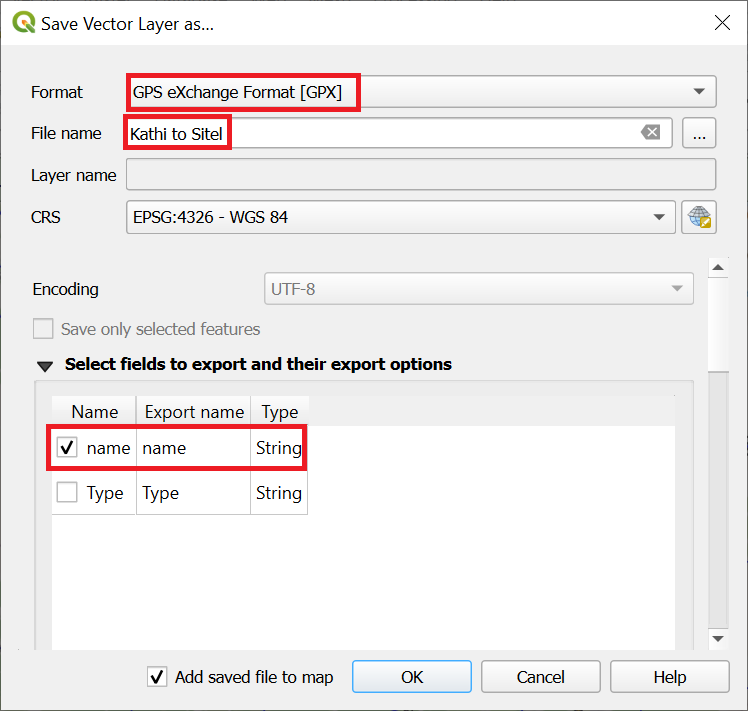
Important – “name” field should be in lowcase. Upcase is NOT supported by GPX format. Download the exported GPX file to your phone or watch to start navigating
Hiking Routes
In addition to the POIs we can also retrieve the entire hiking route corresponding to the traverse. Query “route=hiking” from OSM.
Select the new line vector layer, “Toggle Edit”, “Select Features” and multi-select (press Ctrl or Shift) the individual hiking route sections that make up the entire traverse

You can bring up the Attribute Table and filter on “Show Selected Features” to show the individual sections that make up your traverse

Right click on the layer to Export Selected Features only as a GPX file
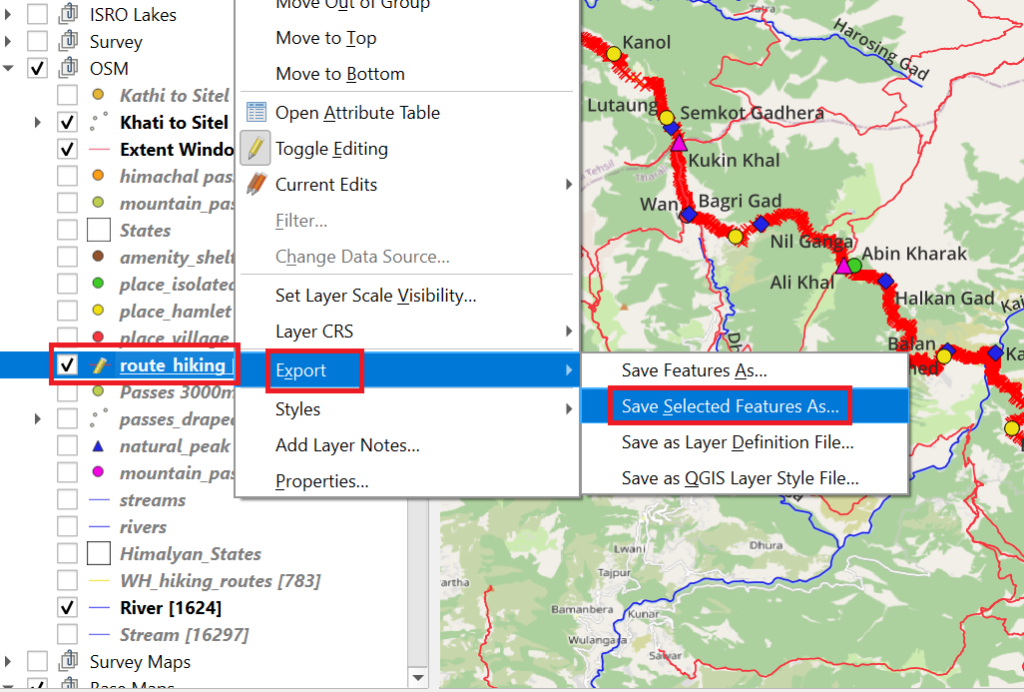
Export in GPX format, give a proper name, ensure the “…” directory is read-write, deselect all fields except for the “name” field.
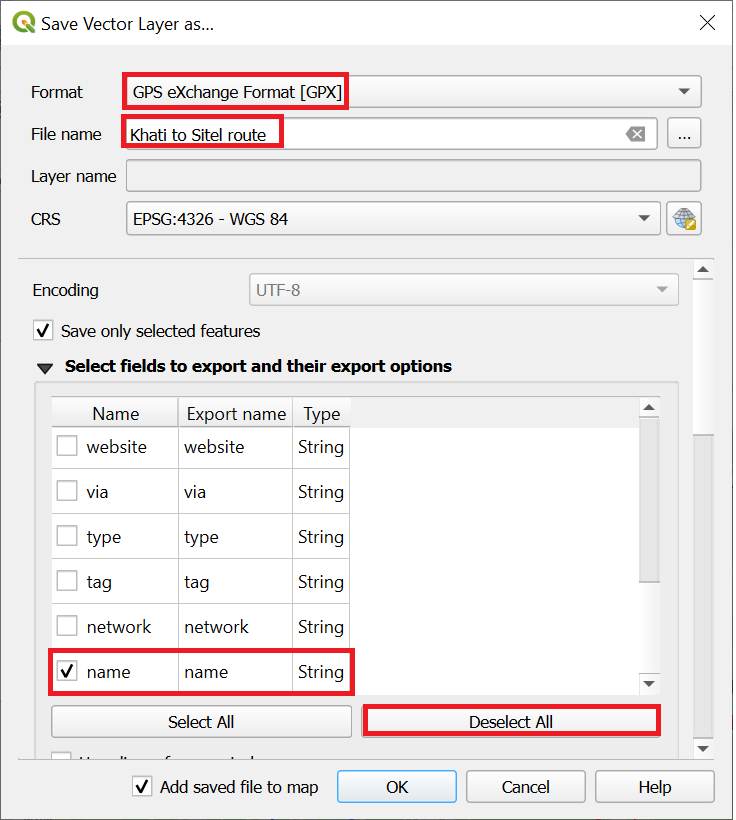
Share the resulting file to your phone to start offline navigation
Assignment
Plan your own multi-day traverse across multiple passes (at least 4-5) following a continuous sequence of OSM (waymarked trails) hiking routes and mark important POIs along the way. Export both POIs and route segments as GPX file and load them in your phone.