Introduction
No doubt the most detailed topographic maps of the Western Indian Himalayas are published by the Survey of India. These maps contain a true treasure of information for the Himalayan hiker: topography (streams & valleys), remote settlements (night halt, food supply), mountain passes & peaks, 63 thousand kms of beautiful paths & trails, alpine lakes, terrains (cultivation, forest, meadows, moraines & glaciers), etc. Originally created during the Great Trigonometric Survey in 1802-1871 the maps were not fully released to the general public until recently.
Map Sheets
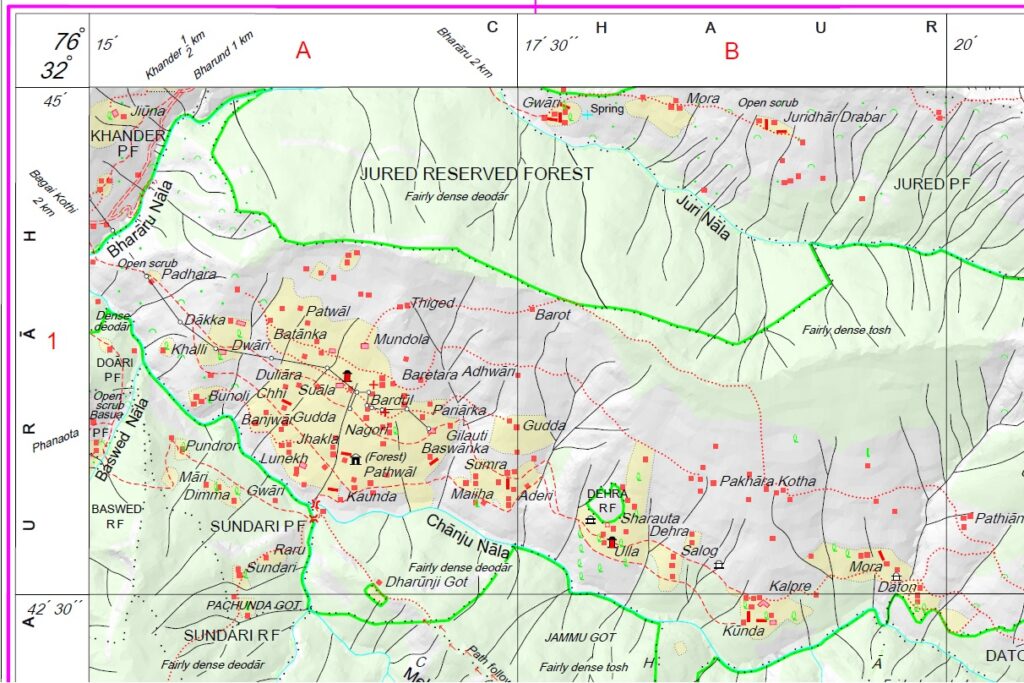
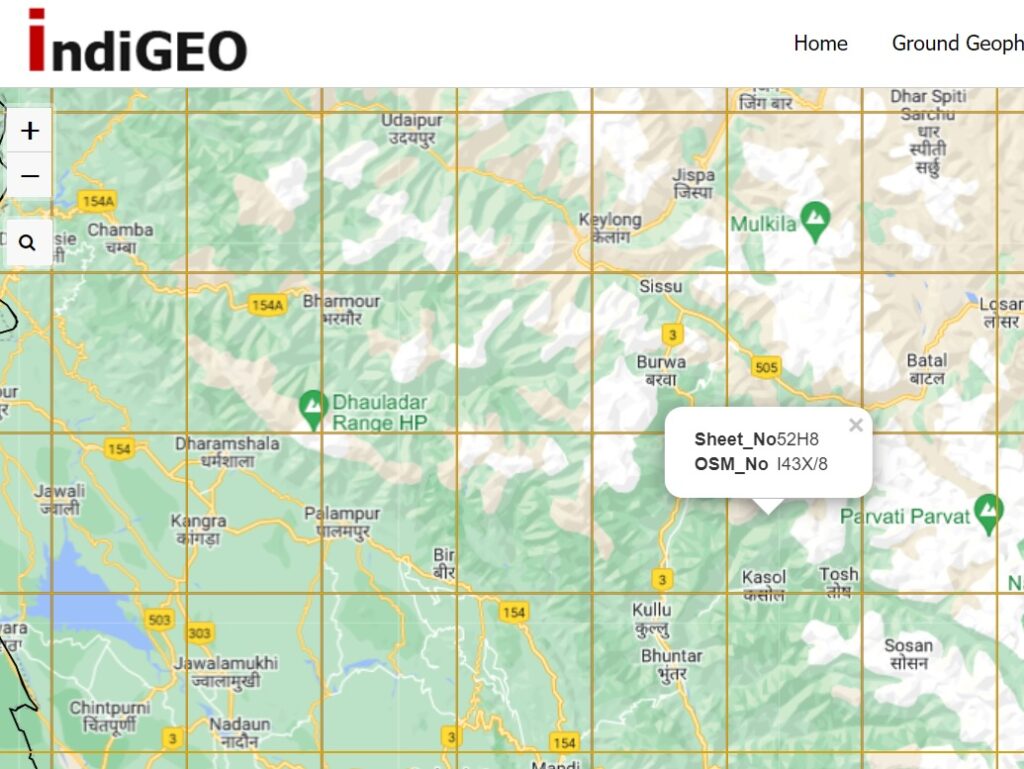
The Survey maps are published as individual sheets of 15×15′ (arc minutes) or 28x28km. Each Himalayan state consists of about 50-60 map sheets. Latitude and longitude of each of the 4 corners is indicated allowing us to geo-reference and use the maps for planning and navigation. Each sheet is uniquely identified by an OSM (Open Series Map) nr and toposheet nr (old system). Best way to identify the the right sheet is through the web site indigeo.com. Enable OSM Index / Topo Map Index in the layers icon to show the new / old sheet nr.
Downloading Maps
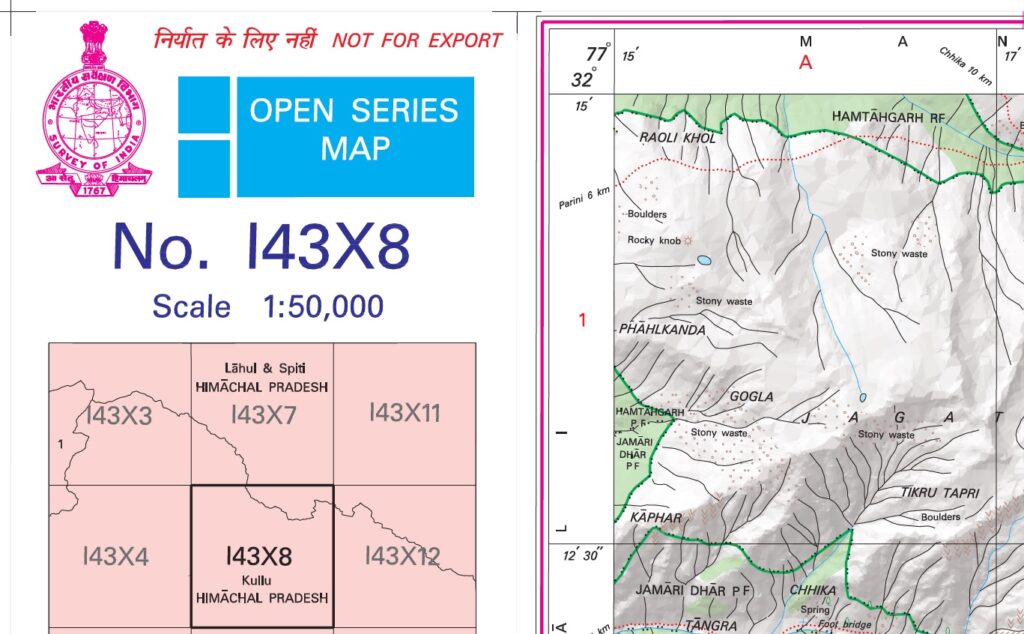
Once you identify the right Topo Sheet nr (e.g. 52H/8, Parvati valley) for the region of your interest you can download the corresponding map sheet from the Survey of India web portal onlinemaps.surveyofindia.gov.in. You ll be requested to create a login ID and there is a maximum daily download limit of 5 sheets. The sheets are published in (vector) PDF format. OSM nrs of neighboring map sheets are indicated. Sheets are projected in UTM (Universal Traverse Mercator) in datum WGS-84 and come at a scale of 1:50K (1cm on map = 500m on the ground). Contour lines are removed from most sheets (security reasons?). Year of latest revision is mentioned on the map.
Terrain Details
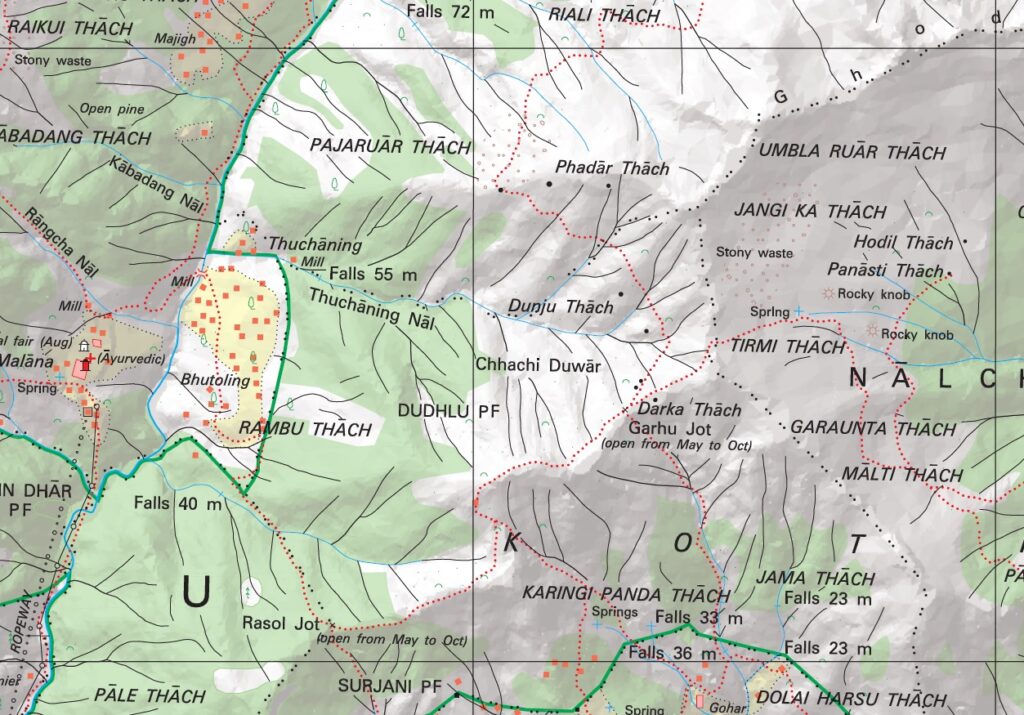
The Survey maps contain a wealth of terrain details:
- Terrain: cultivations (yellow), forests (green), glaciers (light blue), lakes (blue), moraines (black dots), meadows (Thach, Bhugyal)
- Settlements (red squares), urban areas (red polygon)
- Rivers & streams (blue lines, Nala) and gullies (black lines)
- Trails (red dotted) and paths (red dashed lines)
- Ridgelines (black double dotted lines, Dhar)
- Springs (blue cross) and water falls (blue line)
- Boundaries (thick red, black dotted)
- Mountain passes (black X) + opening season
- Mountain peaks (Jot, Tibba)
- Bridges and ropeways
- Temples (white symbol)
Geo-referencing maps
A geo-referenced digital map has been tied to a known Earth coordinate system, so users can determine where every point on the map is located on the Earth’s surface. Geo-referencing a Survey map sheet is straightforward. We first convert the PDF map sheet to JPG format using any web tool like ilovepdf.com. Next crop the JPG image to remove the borders, only keeping the top left to bottom right corners (marked with lat, lon coordinates). A basic image editor like MS Paint can be used for this. Finally we can use various tools to geo-reference the cropped map sheet, like Google Earth.
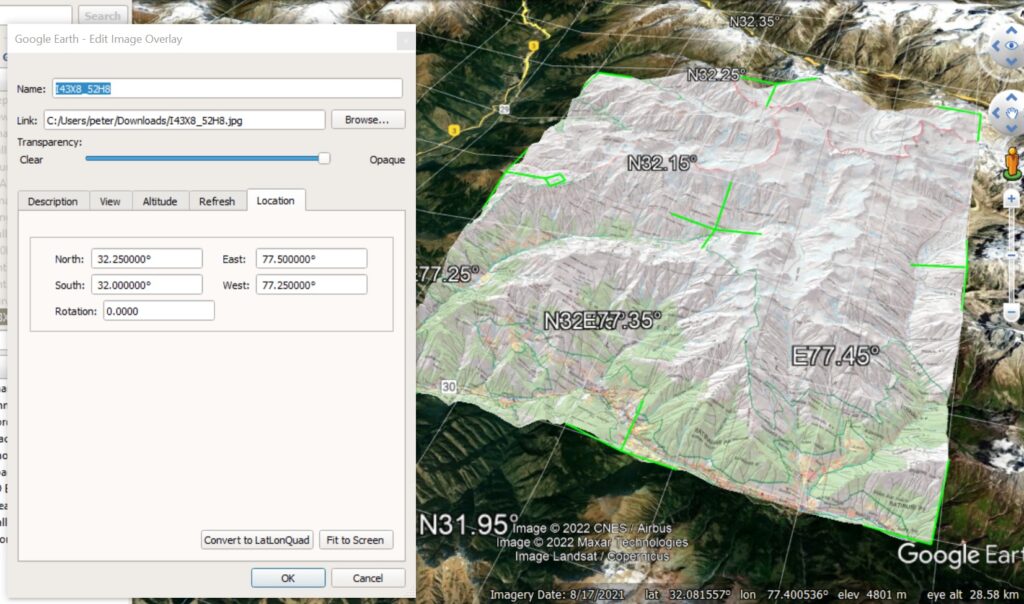
Download and install Google Earth desktop version from this location. Choose Add – Image Overlay – Load the cropped JPG – Enter North/South latitudes, East/West longitudes in Location tab. Google Earth will now show the map sheet in its correct location on the planet surface. You can now zoom in and identify the exact location (latitude, longitude) of every POI (point of interest) on the map. The resulting map can be exported in KMZ format which can be downloaded and opened in Google Earth mobile on the phone for offline navigation:
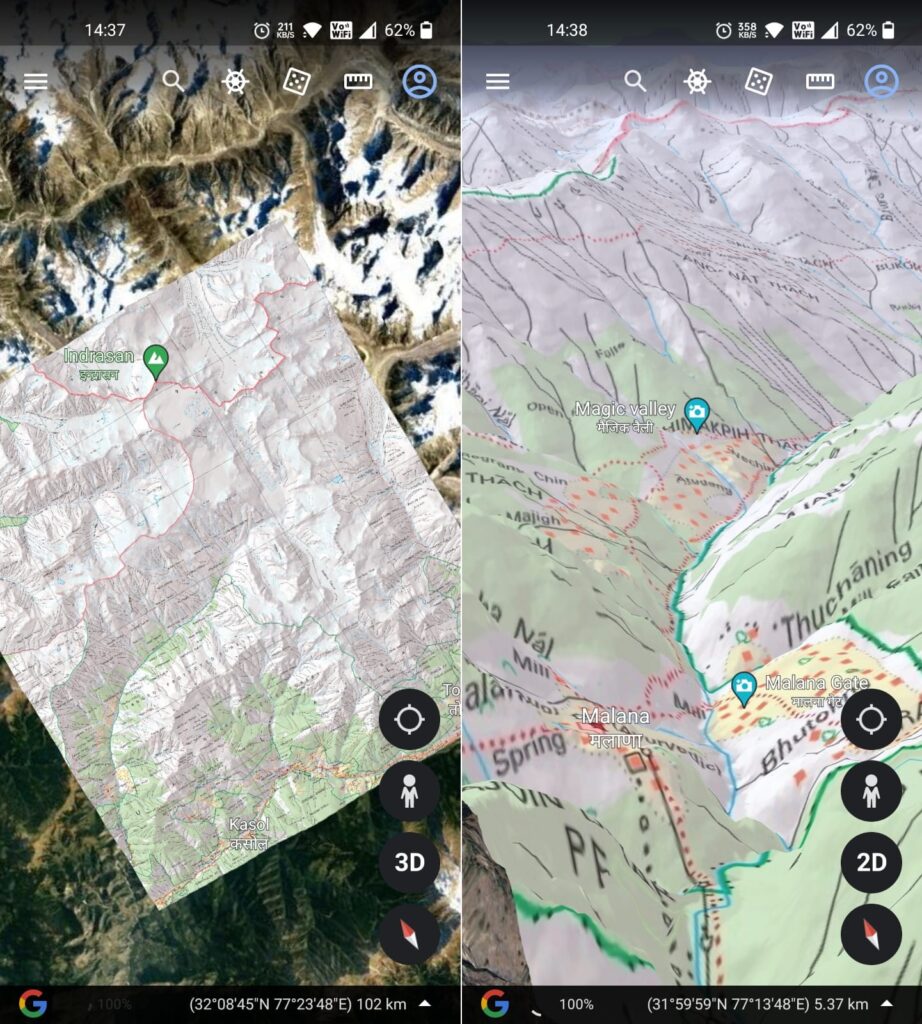
Digitizing Features
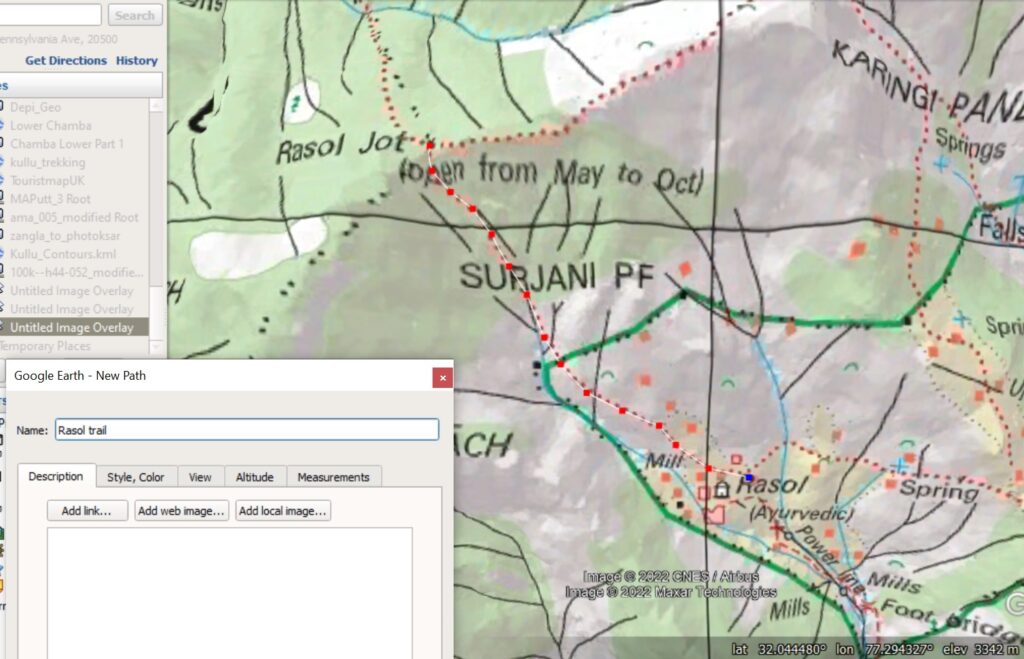
Once a map is geo-referenced it is possible to digitize and extract any features on the map – settlements, trails, mountain passes, etc. In Google Earth Desktop, select the “Add Path” tool in Google Earth and start tracing the trail across the Rasol Jot mountain pass on the Survey map. The resulting path can be exported as a KML file which in turn can be converted to a GPX file using the web site gpsvisualizer.com.
Exploring Features
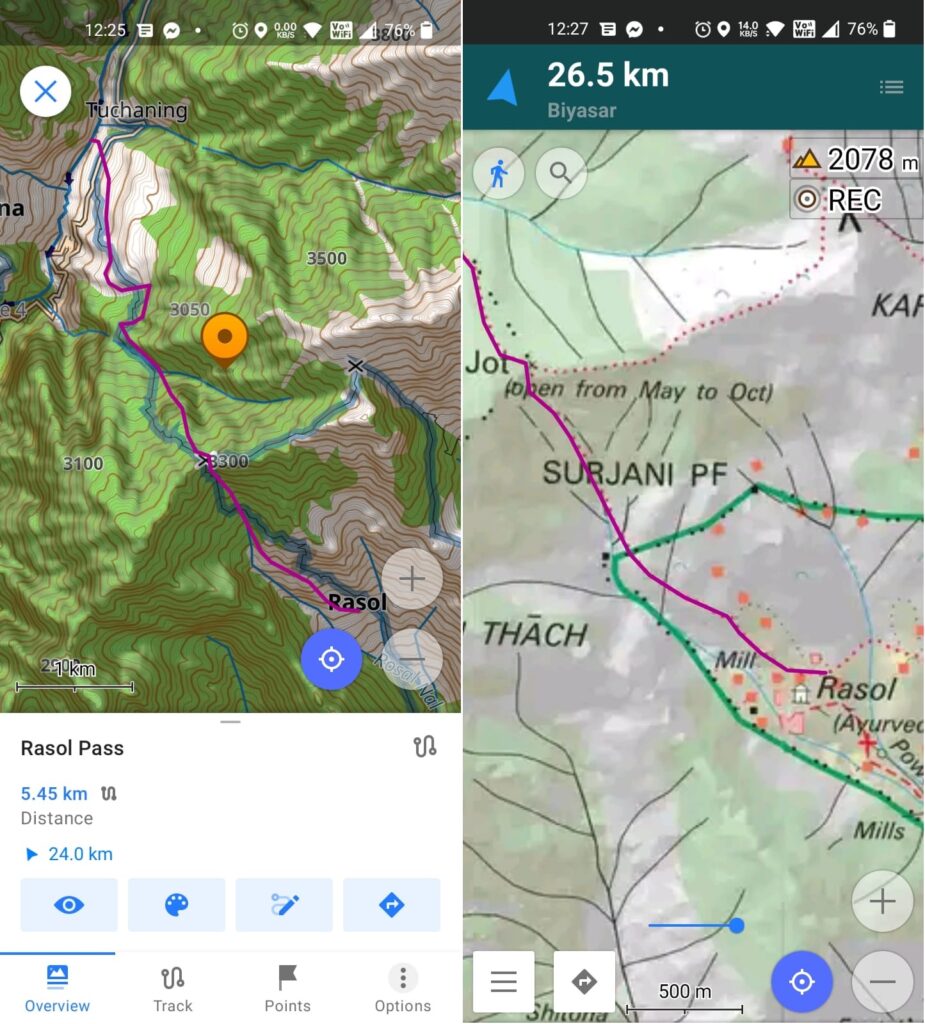
After digitizing features on a geo-referenced map we can export the same and use them for offline navigation in mobile apps. Share the GPX file to your phone and open in OSMAnd to overlay the digitized Rasol Jot mountain pass trail on your base OSM map. You are now ready to explore the Rasol Jot trail on the Survey of India map I43X8_52H8. Note that Survey maps are legacy maps and therefore less accurate than the modern day GPS recorded / mapped OSM trails. Inaccuracy of legacy carto-graphed maps and terrain changes over decades / centuries can lead to changes in locations of trails.
Online Map Tiles
A much easier way (rather then to locate, download, convert, geo-reference individual map sheets) to explore Survey Maps is through an online Map Tile Server:
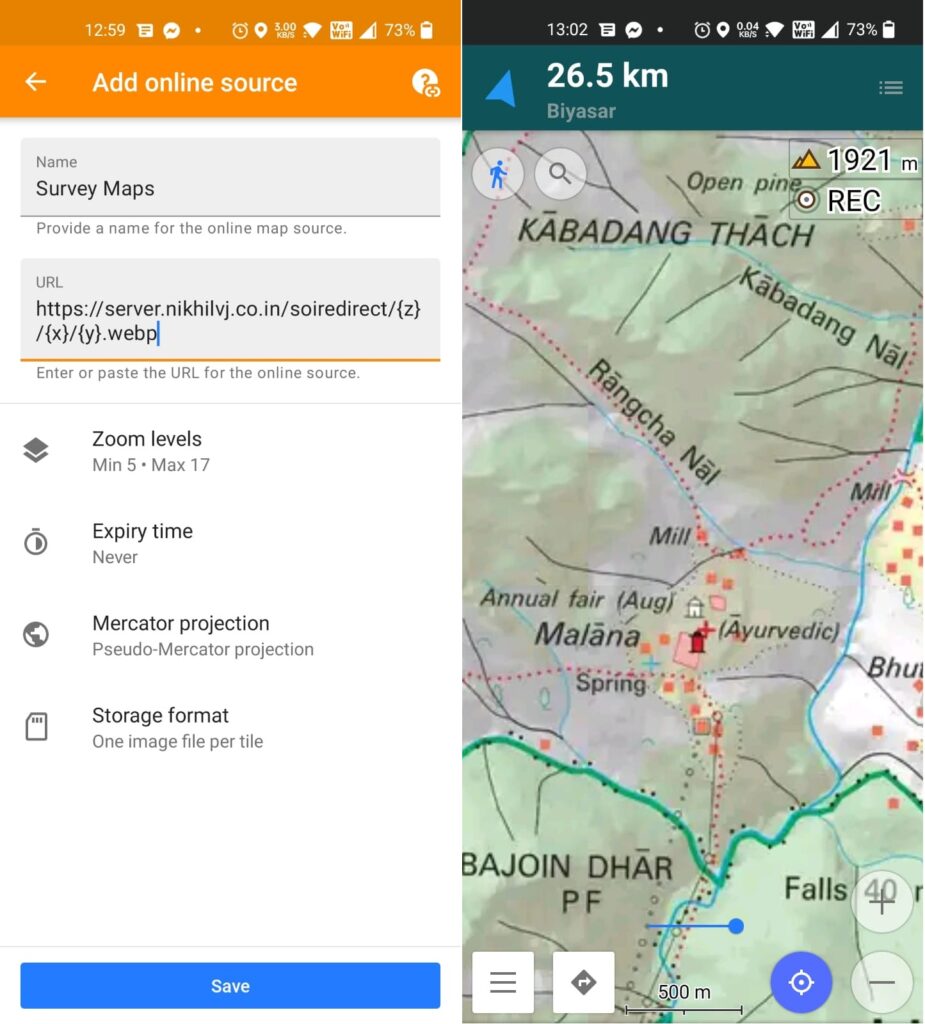
https://server.nikhilvj.co.in/soiredirect/{z}/{x}/{y}.webp
In OSMAnd select “Configure Map”, “Map Source”, “Add” and add a new online map source using above URL and name it “Survey Maps”. Keep your base map “Map Source” as “Offline vector maps” (OSM) but change “Overlay Map” to “Survey Maps”. Using the transparency slider at the bottom of the screen you can now overlay Survey Maps directly over your OSM basemap.
Route Planning
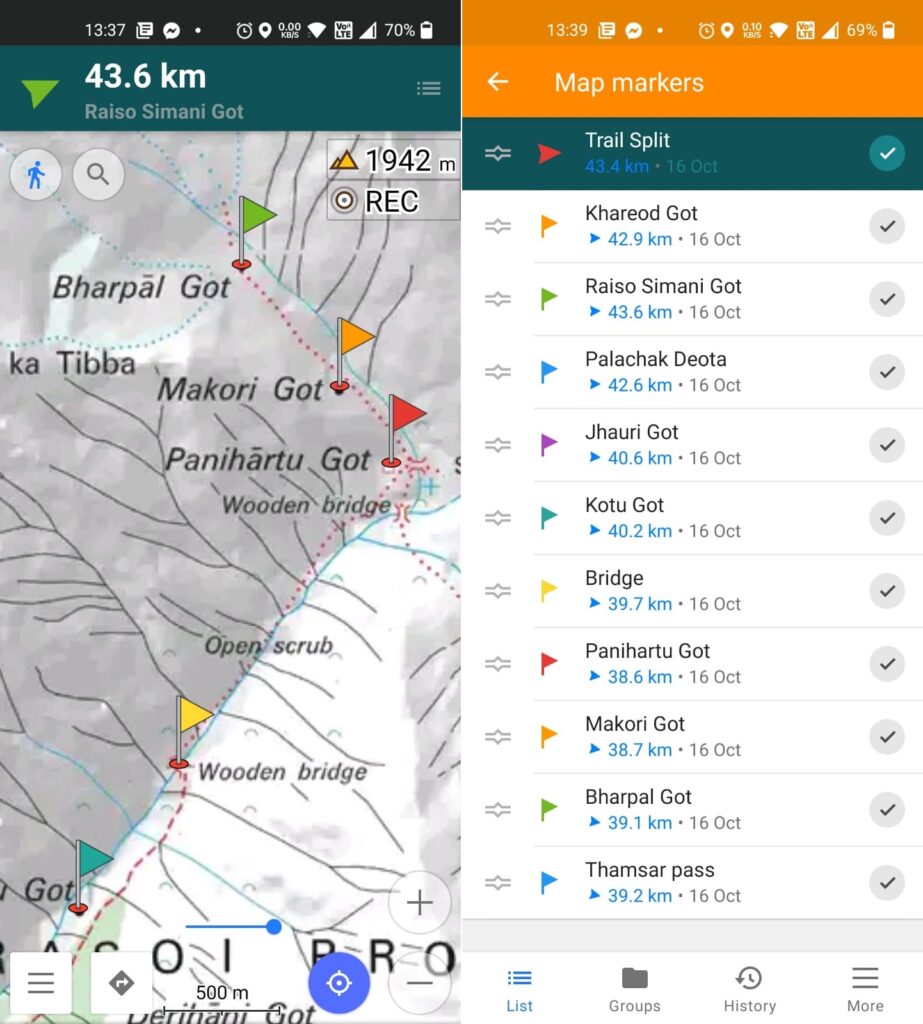
Important to note is that this is an online map source which cannot be used for offline navigation in the mountains (although OSMAnd maintains a cache of map tiles recently seen). What we can do however is mark important POIs along the planned route which can used for offline navigation along a Survey map trail. In OSMAnd mark important points (periodic trail points, localities, shelters, stream crossings, trail splits…) on the Survey overlay map and use these as reference points for offline navigation.
Offline Map Tiles
Yet another way to explore using Survey maps is to convert them to offline map tiles. This way the entire map can be downloaded on the phone for offline navigation in the mountains. Download and install the versatile map creation tool MAPC2MAPC. Open the cropped Survey map “I43X8_52H8.jpg” in the mapc2mapc tool using “Load an image file and calibrate it”, “Calibrate Two corners”, “Latitude/Longitude”, “WGS 84”, North West = “32 deg 15 mind”, “77 deg 15min”, South East = “32 deg”, “77deg 30min”, “Save the map for a mobile app”, “OSMAnd SQLite”
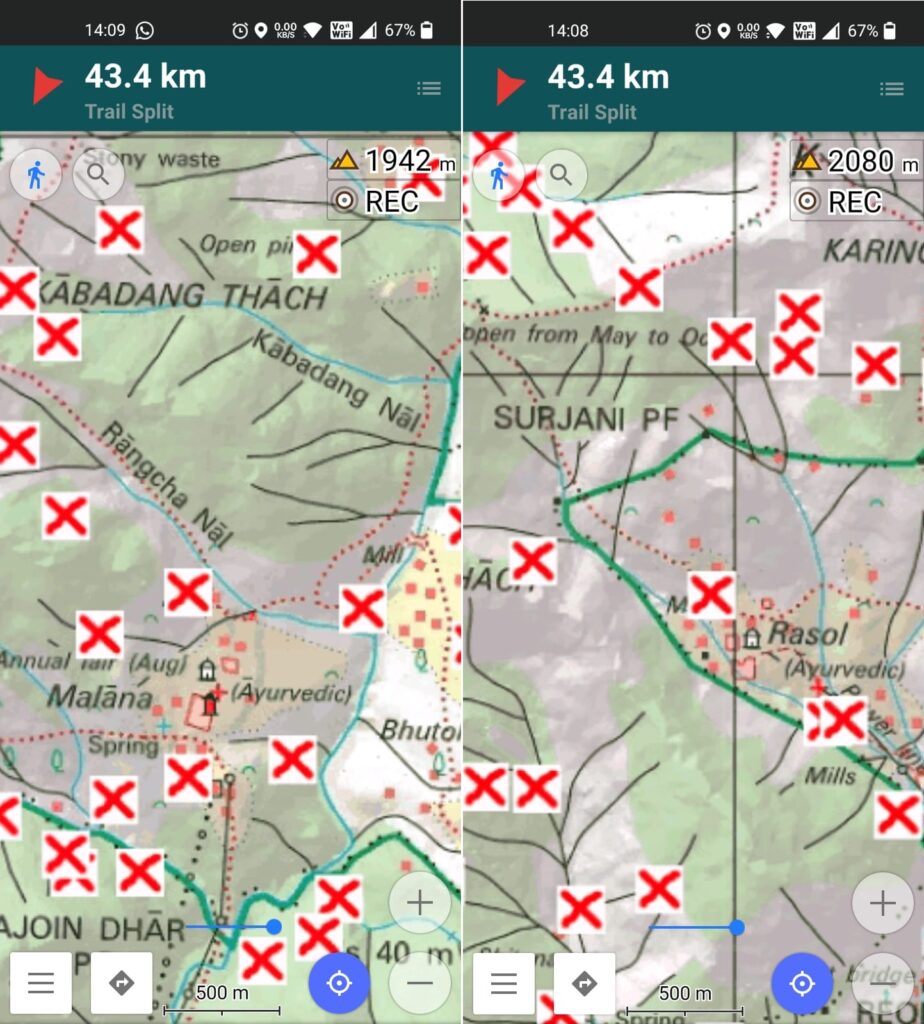
Download the output file “I43X8_52H8.sqlitedb” to your phone and open in OSMAnd. Set as an Overlay Map and slide the transparency slider to right to view the map for the Parvati region. You now have the most detailed map of the Himalayas in your hand for offline exploration.

Thank you so much for this Peter! Will definitely try this out before it expires
I love what you’re doing, Peter. Keep up the good work and maybe we can hike / run some time together in the Himalayas 😄 Greetings from Costa Rica
Do keep me updated on your future plans and we might meet up somewhere in between Daniel!