
Congrats on completing the first 5 chapters of the Alpine Style bootcamp:
Chapter 1 – Maps of the Himalayas
Chapter 2 – Navigating the mountains
Chapter 3 – Planning your journey
Chapter 4 – Minimalist fast-hiking gears
Chapter 5 – Himalayan Terrains
You are now ready to explore the Himalayas! In the next chapter 6 (laptop required) we will do some really cool stuff which is gonna blow your mind:
Module 1 – QGIS, freeware GIS
Module 2 – Importing and analyzing data
Module 3 – OSM data
Module 4 – Geo-referencing maps
Module 5 – DEM & contours
Module 6 – Maptiles
GIS stands for Geographic Information System and is a conceptualized framework that provides the ability to capture and analyze spatial and geographic data. We will be using QGIS (Quantum GIS), a free and open source GIS software available on Windows, Mac and Linux to query and combine geographic data from various sources including Open Street Maps, Survey maps, DEM and geo-coded data useful for analyzing and mobile offline navigation.

Installing QGIS
Ensure you have a laptop or desktop (sufficient CPU power and memory / disk space) and Internet connection to install & run QGIS. Let’s start by downloading and installing this free software:
Download the latest stable version for your platform (Windows, Mac or Linux)
Use Express Setup and select these options:
QGIS (Quantum GIS)
GDAL (Geospatial Data Abstraction Library)
GRASS GIS (Geographic Resources Analysis Support System)
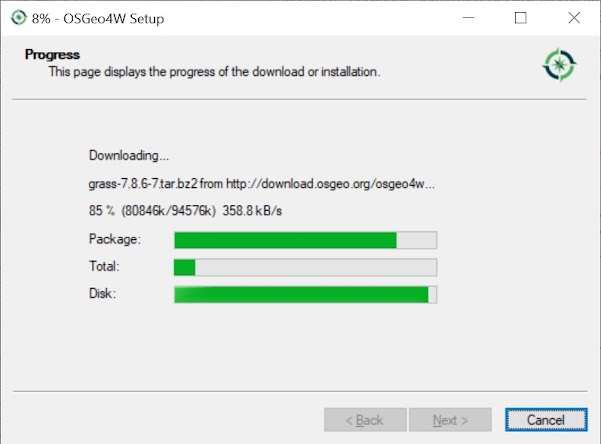
Download and installation can take considerable time so be patient.

Getting Started
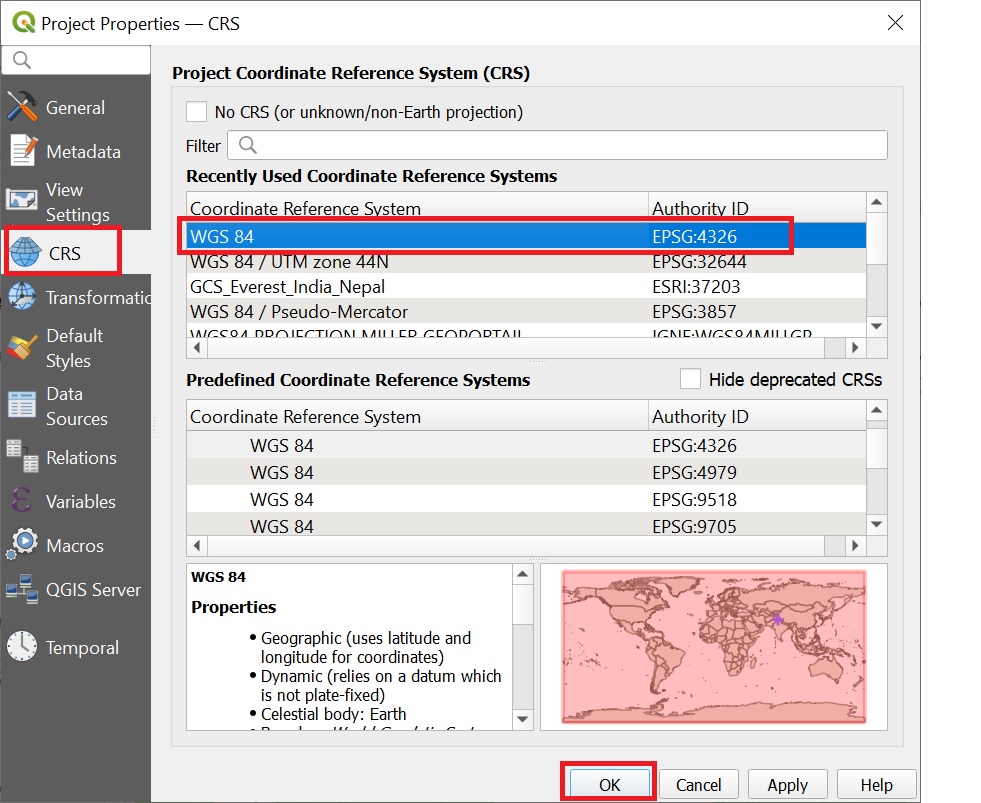
Start QGIS from the Windows / Mac / Linux start panel. Now choose Project – New to create a new project. You’ll see a blank screen. Select “Project” menu, choose “Properties”, select “CRS” tab and set “”WGS84, EPSG:4326” as the CRS (Coordinate Reference System) and click OK. This will show main screen in default latitude, longitude projection, the common modern-day satellite based CRS. See Image 1 below
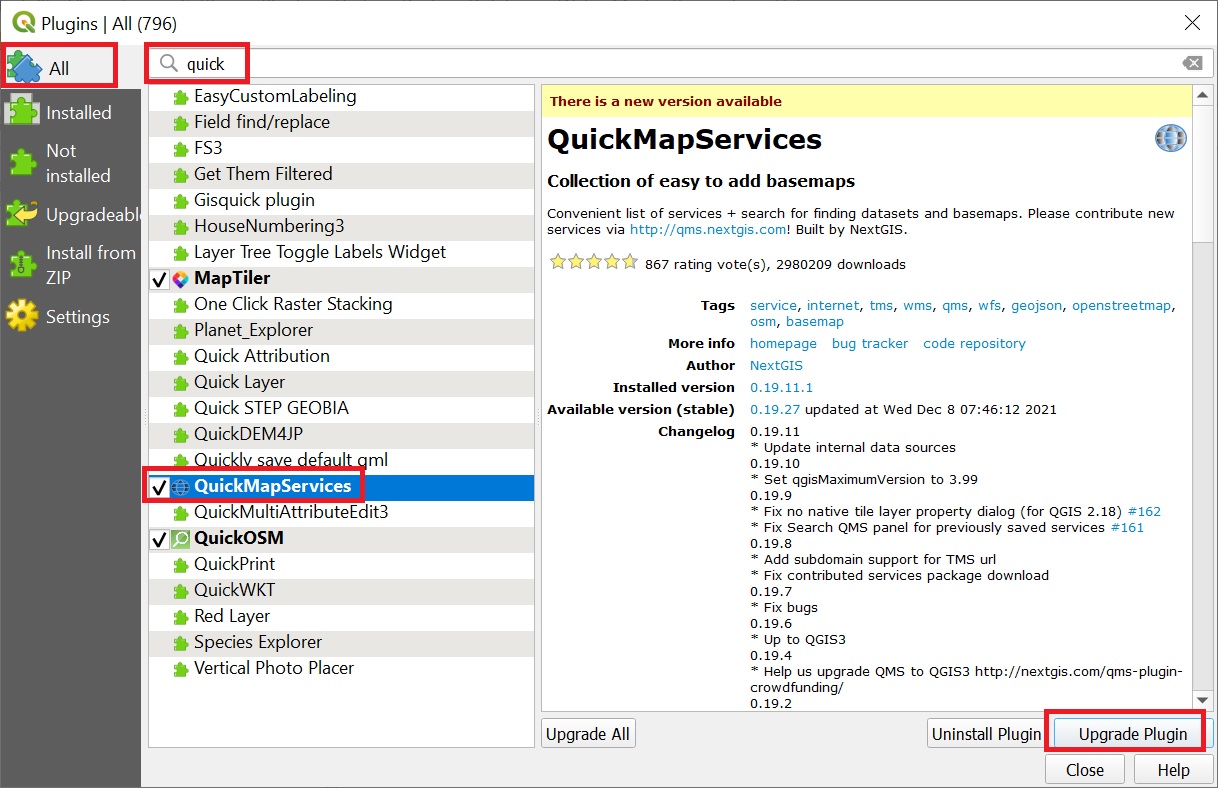
We can now add various layers with geographic data. Let us start by adding an Open Street Maps base layer. For this let’s first install a handy plug-in called “QuickMapServices”. Select Plugins menu and choose “Manage and Install Plugins”. You will see hundreds of interesting plugins which can be added to QGIS. Type in “QuickMapServices”, select the plugin and press the Install button. See Image 2 below.
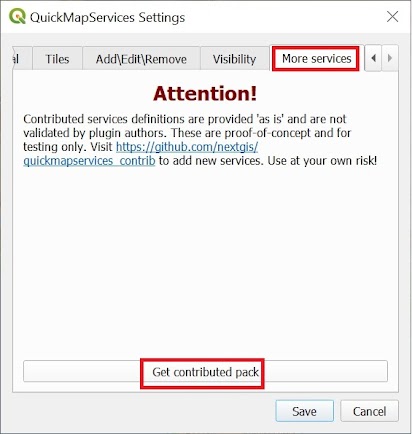
The plugin will be added to the QGIS “Web” menu. Select “QuickMapServices” submenu and chose “Settings” in this menu to configure the plugin. Select the “More Settings” tab and click “Get Contributed Pack” to install various public available map sources to the menu. See Image 3 below.
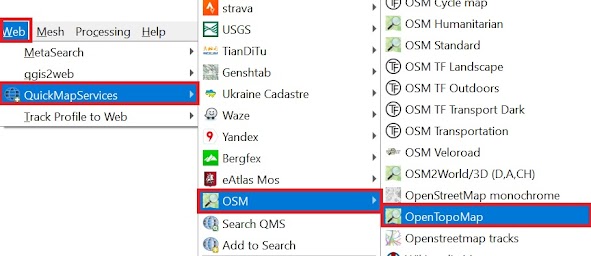
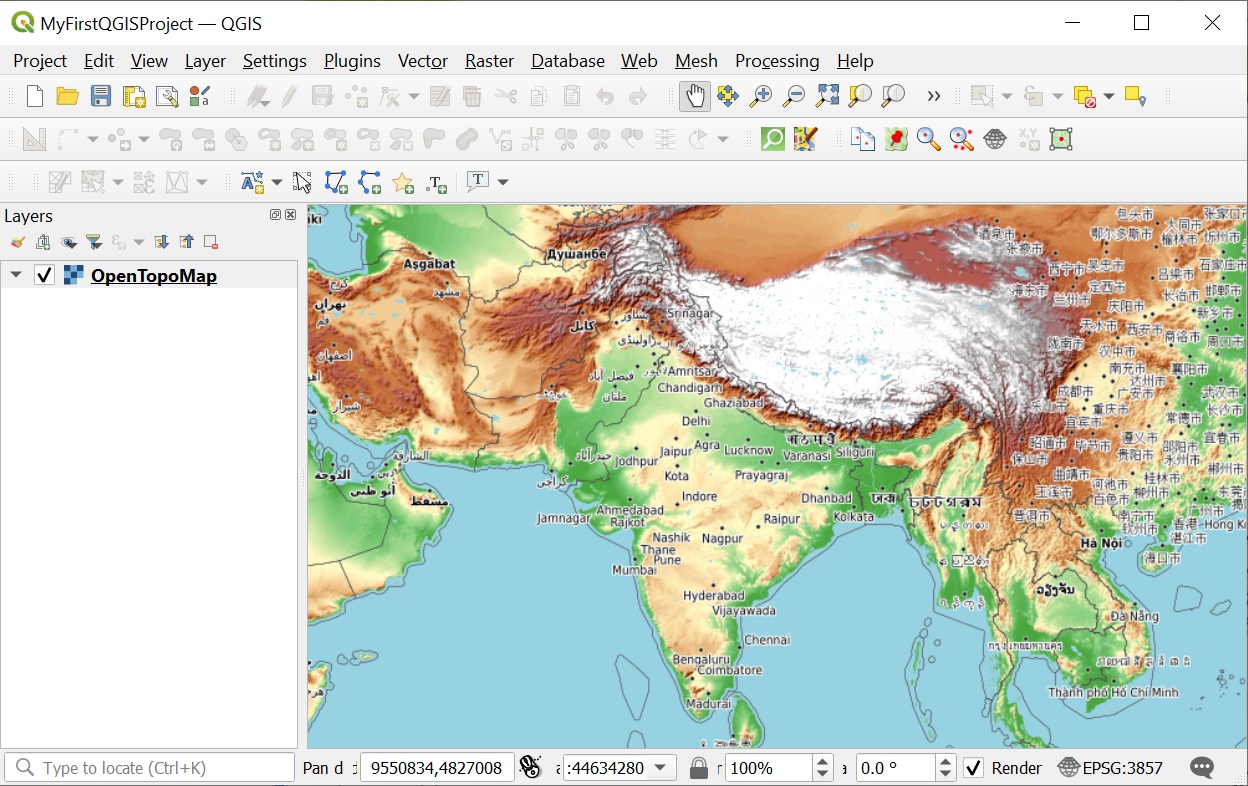
After downloading the pack close the dialog and choose “OSM”, “Open Topo Map” from the Web/QMS menu to create a raster layer (shown in left pane) which renders an OSM base layer with contours. You can zoom in / out and pan across various parts of the map. See Image 4+5 below.
Assignment
You can finally save your project as “MyFirstQGIS project” and exit QGIS. To successfully complete this module, take a screenshot of QGIS with the OpenTopoMap base layer showing the Western Indian Himalayas and submit it in a public folder using below form.