Congratulations for completion Chapter 1 where we learned about the Geography of the Western Himalayas, Topography (Contours) and various detailed maps like Open Street Maps, Waymarked Hiking Trails and Survey of India maps to plan a hiking traverse.
In Chapter 2 we will focus on Navigation or how to find your way across the mountains. There are various methods which can be used:
Module 1 – Mobile / GPS
Module 2 – Geo-referenced maps (OSM)
Module 3 – Recorded routes (GPX)
Module 4 – Reference map (Olizane)
Module 5 – Off-trail (Contours)
Module 6 – Compass
GPS based Navigation
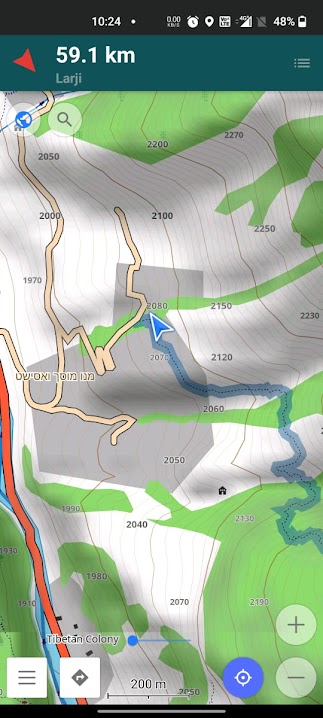
The easiest way to navigate is using a GPS (Global Positioning System), a satellite based network that allows you to identify your exact location on the planet. All mobiles have a GPS receiver built in or you can use dedicated GPS receiver (e.g. Garmin). Using a geo-referenced map your current location can directly be shown on the map making navigation a breeze. Just follow the blue arrow along the hiking trail on the map similar to Google Maps.
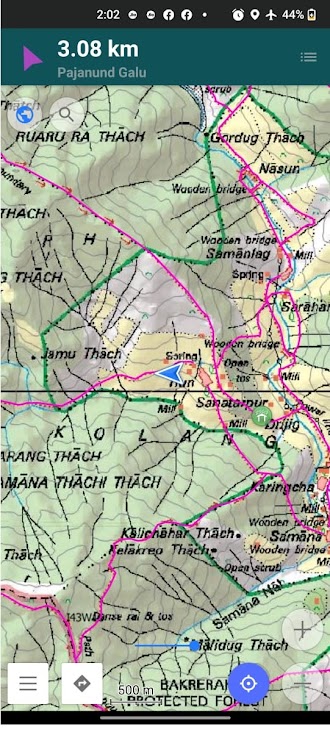
Below shows a geo-referenced (more on this later) Survey map overlaid with 100m contours downloaded in phone (suitable for offline use). Our current location is shown as a blue arrow (arrow points to direction of movement) following a trail (pink line) passing through Sanataipur village
Mobile Navigation
In this chapter we will start using a versatile mobile app to illustrate the different methods of navigation. OSMAnd (available for Android & iPhone) allows offline mobile navigation. Maps for entire states can be downloaded in the phone as we don’t have Internet access in the mountains. Start by installing the app:
https://play.google.com/store/apps/details?id=net.osmand
https://apps.apple.com/in/app/osmand-maps-travel-navigate/id934850257
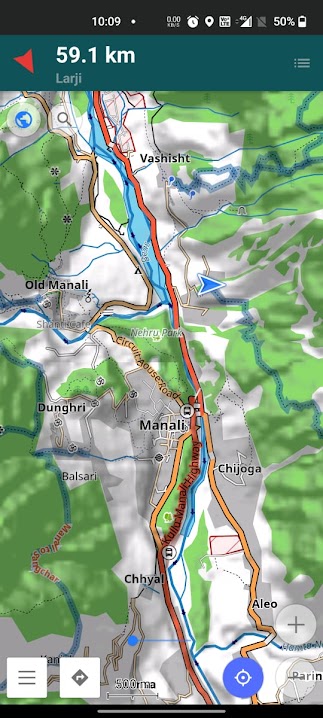
Once installed on the phone, click on the main menu, choose “Download Maps”, Asia, India, Himachal Pradesh to download the Open Street Maps for the entire state of HP. Once downloaded, search for “Manali” and Zoom in/out and pan around to see the various terrain features of the OSM map:
Topography
We immediately notice that one important terrain feature is missing: contours. In order to enable contours in OSMAnd you will need to install another app: “Contour lines plugin” (Android)
https://play.google.com/store/apps/details?id=net.osmand.srtmPlugin.paid
(on iPhone there’s no separate app, just click Contours from download maps menu)
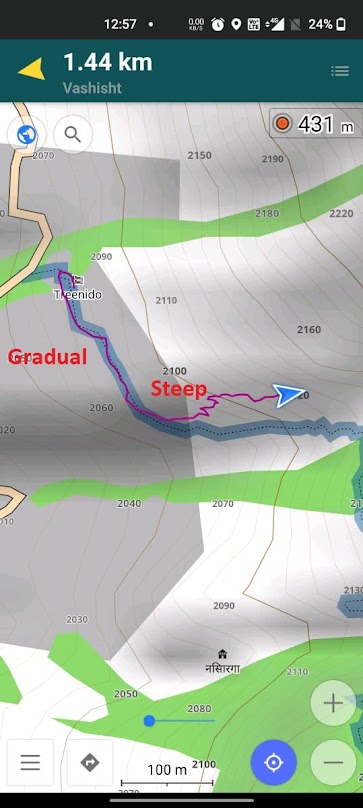
This is a paid / charged feature (200Rs Android / 450Rs iPhone) but is 100% worth it and a must-have for any serious hiker. Topography / contours are essential to plan your hikes and navigate in the mountains. After installing, go to the main menu and download Contours Lines / Hillshades / Slopes for HP. In the main menu change the Map Style to “Topo” for better rendering of contours. Restart the app and you’ll now see contours displayed over the standard OSM view. You can now elevation and steepness of the terrain – finer 10m contours and thicker 100m contours.
In the main menu enable “Hiking routes” to highlight the hiking (thicker blue lines) trails on the map (similar to Waymarked Hiking Trails).
GPS Recording
OSMAnd allows you to record your hikes. In the Plugins section of the main menu enable “Trip Recording”. This will show a “REC” icon on the top right of the map. Click this icon to start recording as you head out into the mountains. Enable “Shown on map” to show your hike on the map screen (purple line). The Trip Recording screen will show info like speed and altitude of your hike. Click “Finish” to end the recording.
GPS Recorded hikes are shown in the “My Places” screen accessible from the main menu. You can show / hide them on the map and bring up useful statistics of your hike (total distance / duration / ascent / descent), elevation / speed profile.

Power Management
It’s important to say a few words on power management. As you completely depend on your mobile for GPS and offline map reference for finding your way it’s critical to manage power efficiently / extend battery life:
Keep phone in flight mode (anyway no network in mountains) – usually comes for 1-2 full days
Carry a 10K mhA power bank – extends for another 2-4 days
Recharge your phone whenever you pass a village / dhaba with power / solar
This will allow you to navigate across longer traverses of 3-6 days.
Assignment
Install OSMAnd on your phone. Download the (state / country) map & contours for your current location. Go for a short hike in your neighborhood (road or trail is fine) and GPS record the route. If there is a hill nearby go for a hike there to correlate steepness on ground with the contours on the map. The closer the contours along your route, the steeper your hike. Take a screenshot and upload in a public folder for review.