In module 2 we explore the various ways to contribute to Open Street Maps through the mobile app OSMAnd:
Adding points of interest (POIs)
Uploading tracks as OSM traces
Adding OSM notes
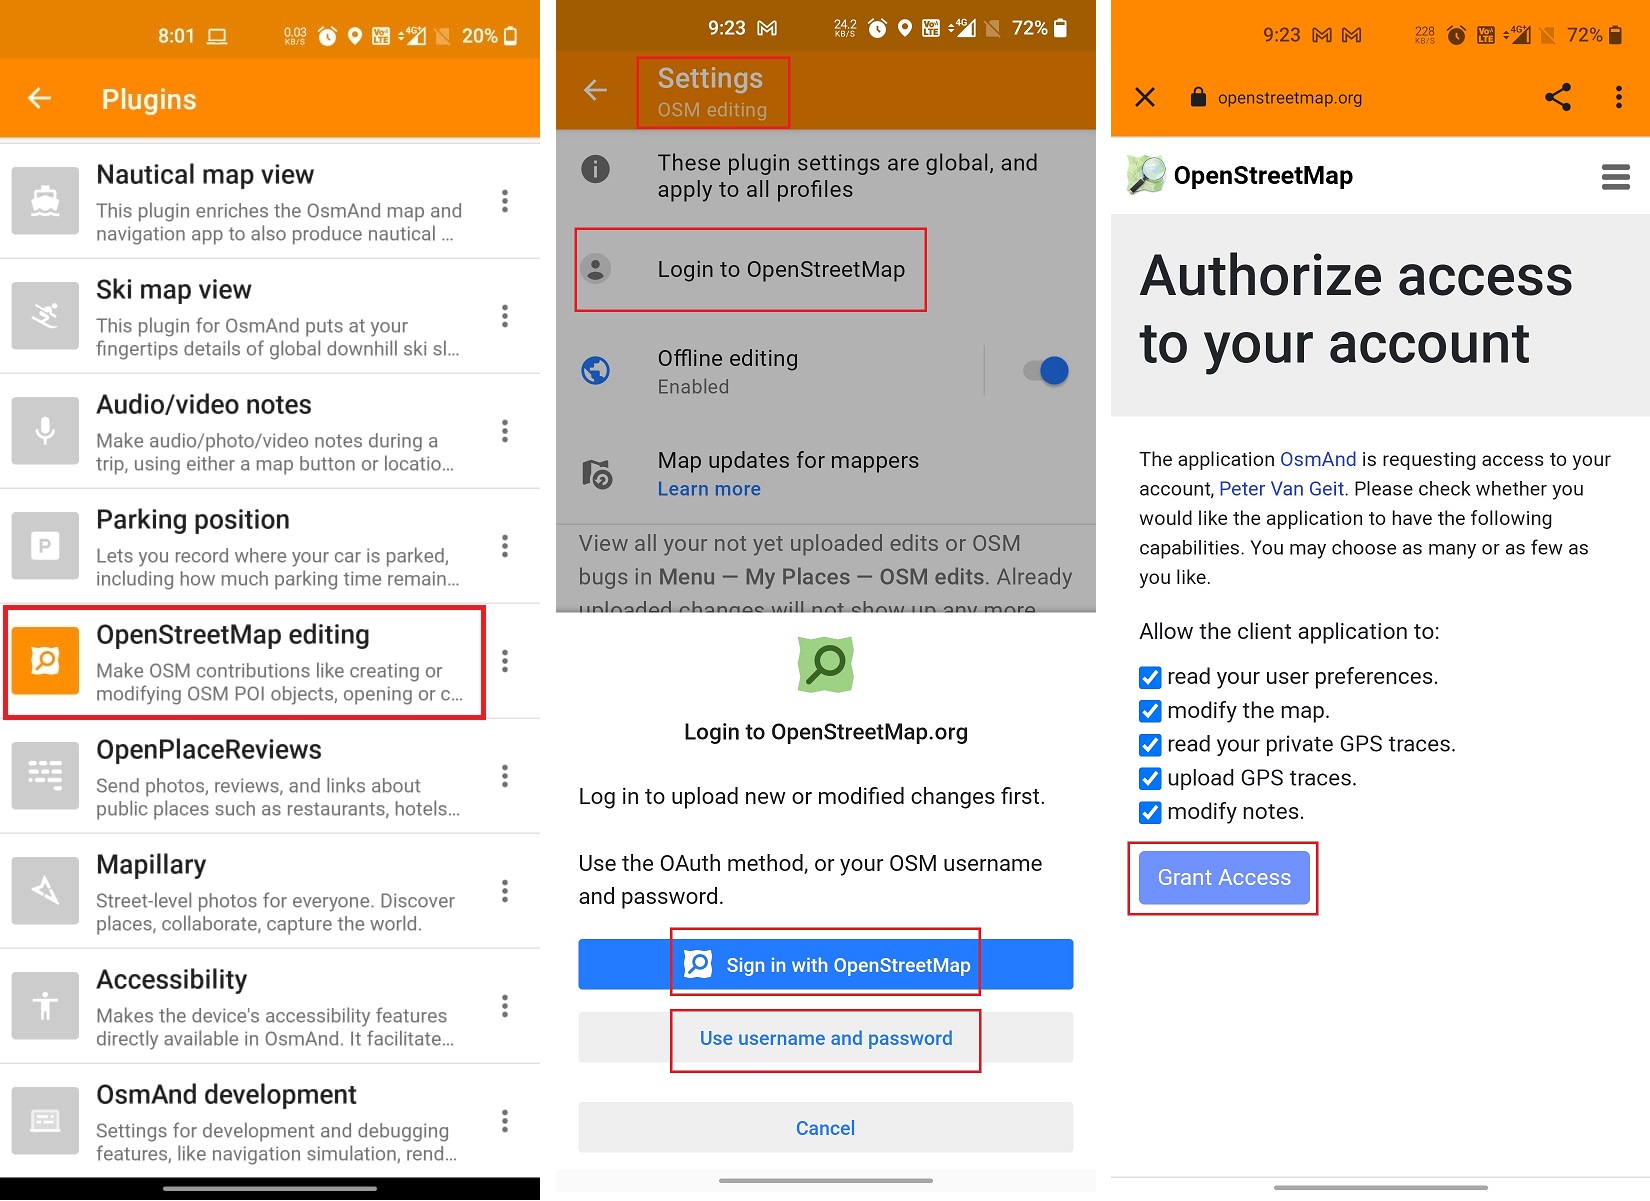
Ensure the “OpenStreetMap Editing” Plugin is active. In the Plugin “Settings” login to your OSM account either by entering username/pwd or “Sign in with OpenStreetMap” through the web. The latter option will request you to authorize access to your account. Once OSMAnd is connected to your OSM account you are ready to contribute! Refer Images 1+2+3 below.
Points of interest
As you hike through the mountains and come across useful outdoor features (not yet mapped in OSM) you can mark them (offline) as points of interest which can later uploaded through your OSM account once you reach back into network. A few useful type of objects:
Settlements: Village, Hamlet, Isolated dwelling
Campsite (flat space with nearby water)
Alpine hut (Guest house)
Shelter (Rock shelter, cave)
Place of worship (religion: Hindu, Buddhist, Christian)
Spring (drinkable running water)
Cairn (piles of stones marking route)
Viewpoint
Locality (uninhabited, e.g. meadow)
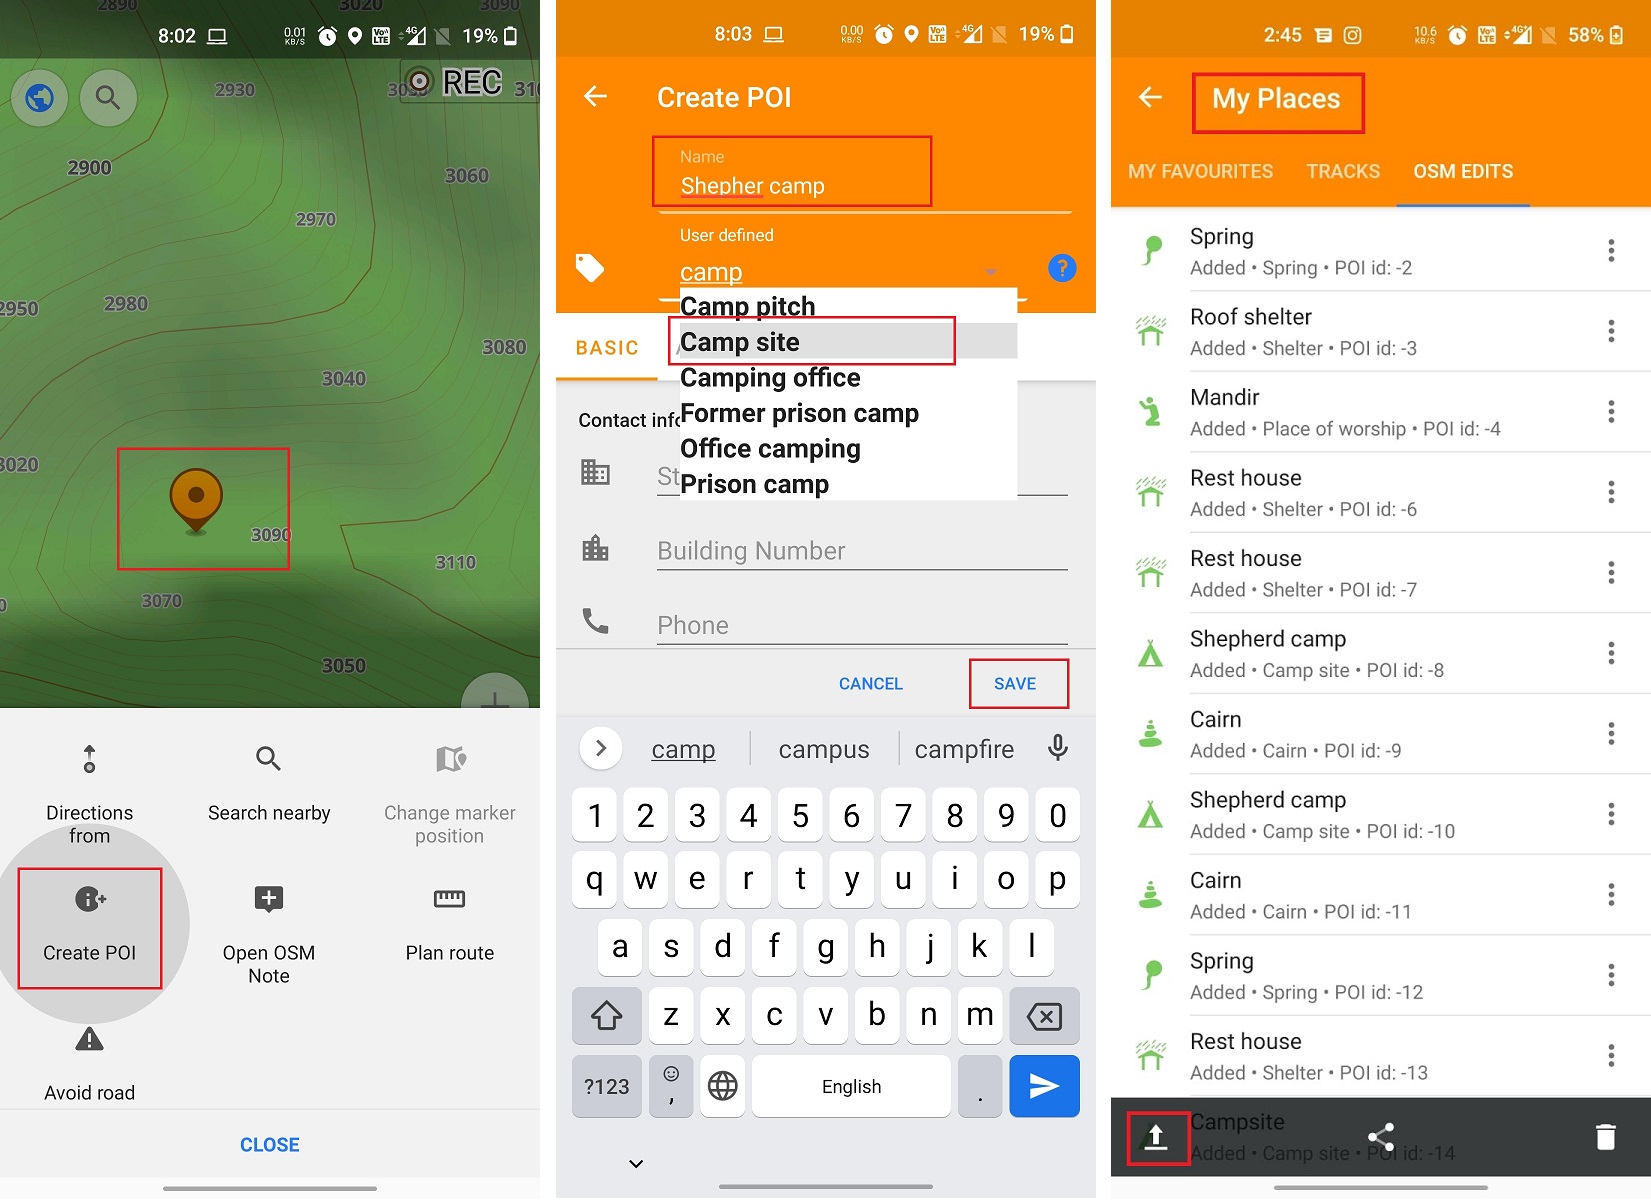
Simply click on your current location, chose “Actions”, “Create POI”, provide a meaningful name and select the appropriate type. Do refer other offline topographic maps (e.g. Survey of India, Olizane, …) for correct names of settlements, localities (e.g. meadows), temples, etc to give an appropriate name to your POI.
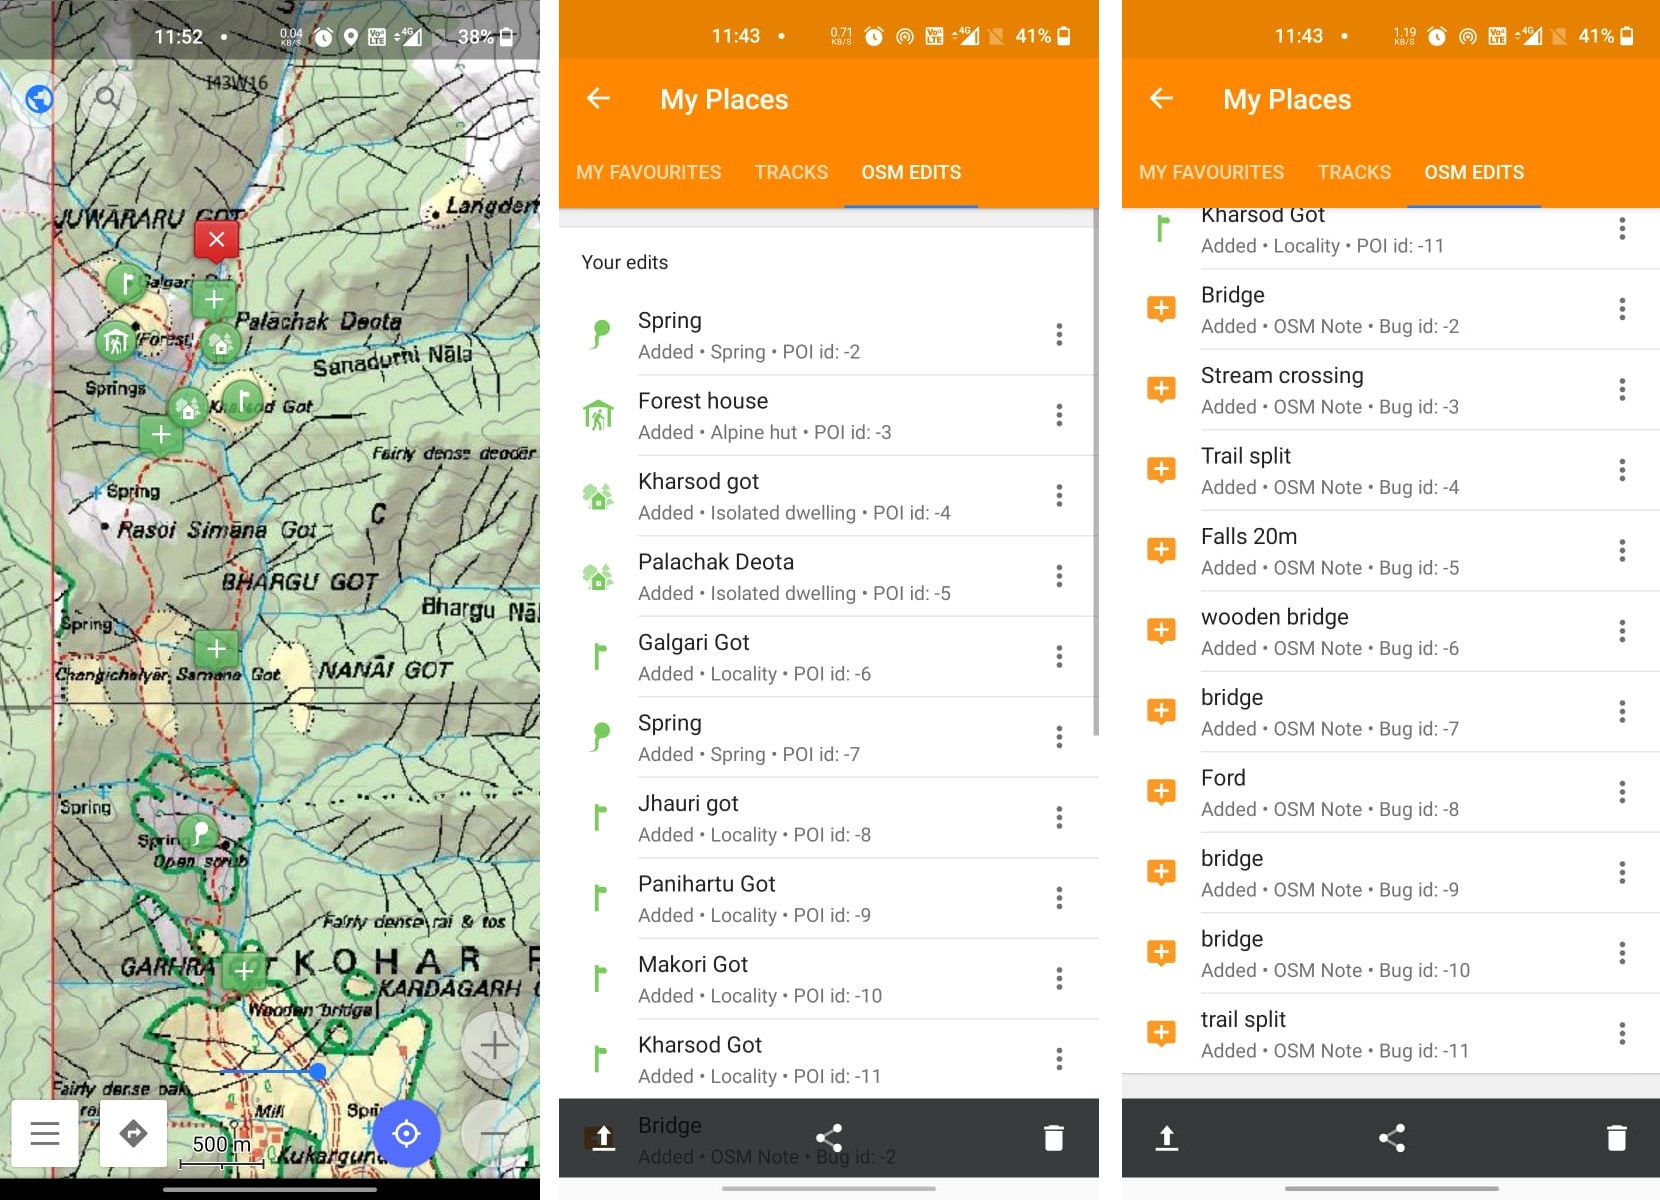
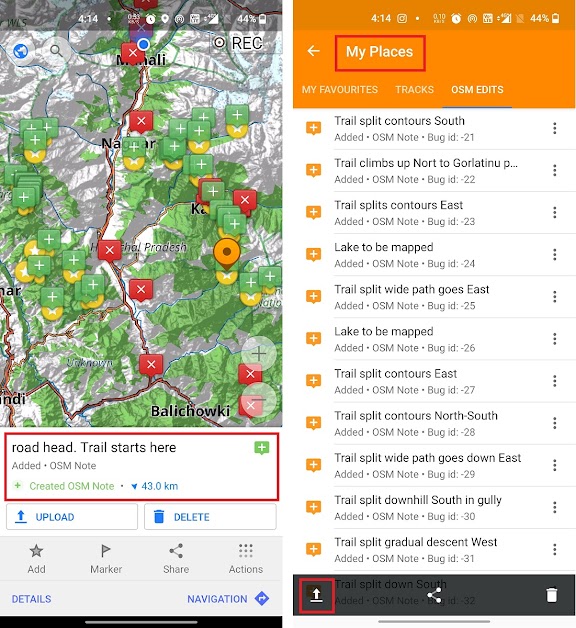
Adding POIs along your hiking route enables other hikers to plan their journey much better: night halts, shelters, water points, settlements, etc. You can find all POIs added under the main menu, “My Places”, “OSM Edits”. Here you can click the “Up Arrow” bottom left icon to upload all your POIs to OSM where they ll be visible to the world wide hiking community. See Image 1+2+3 below
Note that depending on the OSM web client or mobile app used, it might take a few days or weeks before the newly added POIs appear. Many of these use cached map tiles which are updated only periodically.
Uploading Tracks
Yet another useful feature in OSMAnd is uploading any of your tracks (recorded, imported, manual created) to OSM. These uploaded tracks can be used later by anyone to create proper trails or hiking routes in OSM with appropriate tags (not possible in OSMAnd).
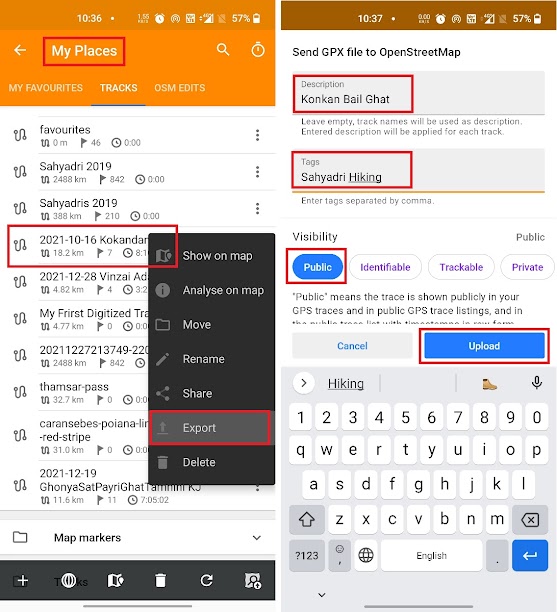
Choose “My Places” in the main menu and go to “Tracks”. Click on the three vertical dots an select “Export”. Provide a proper description and Tags (location, hiking, …) and set visibility as Public if you wish to share with others. Click “Upload” to finally upload to OSM under “My Traces” (see previous module 7A). See Image 1 below.
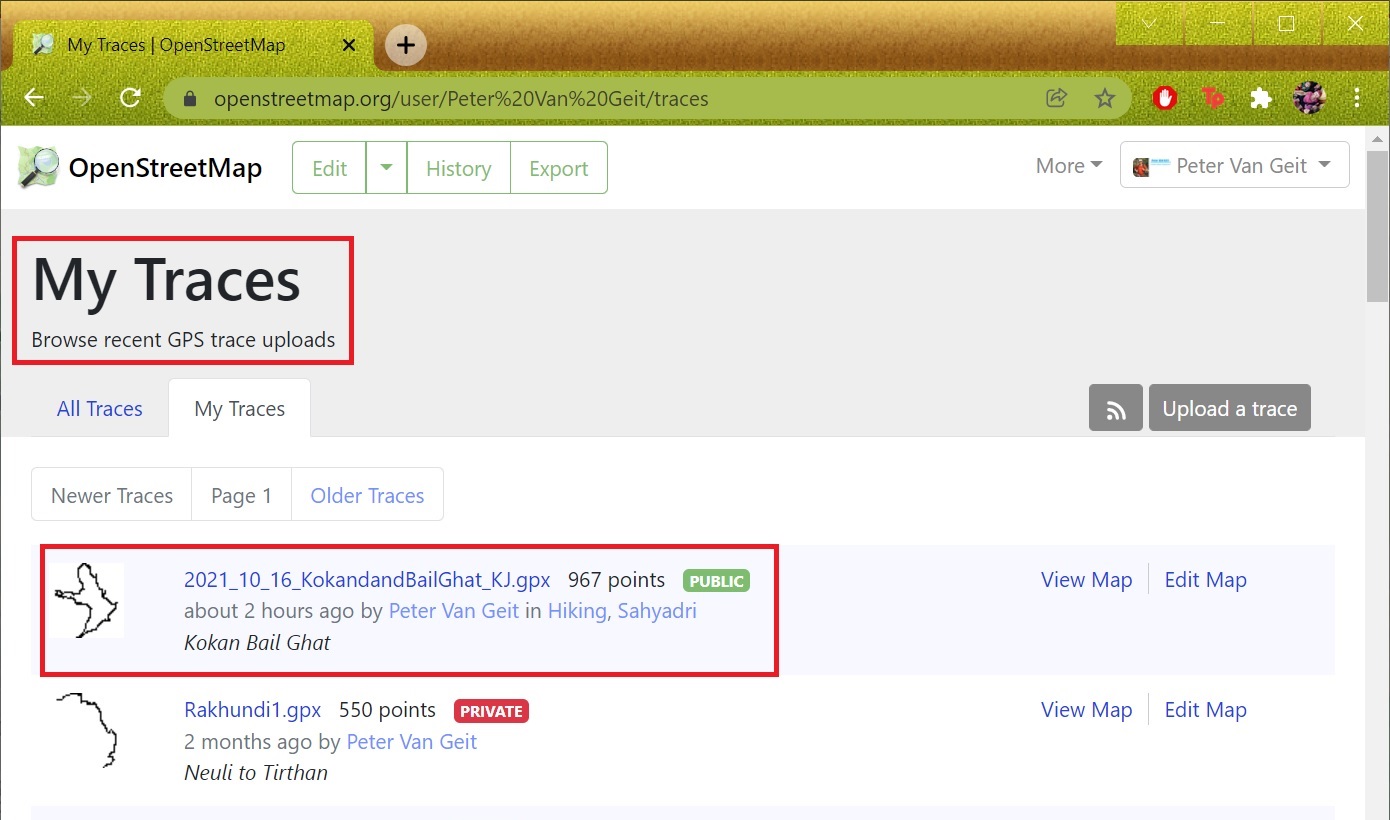
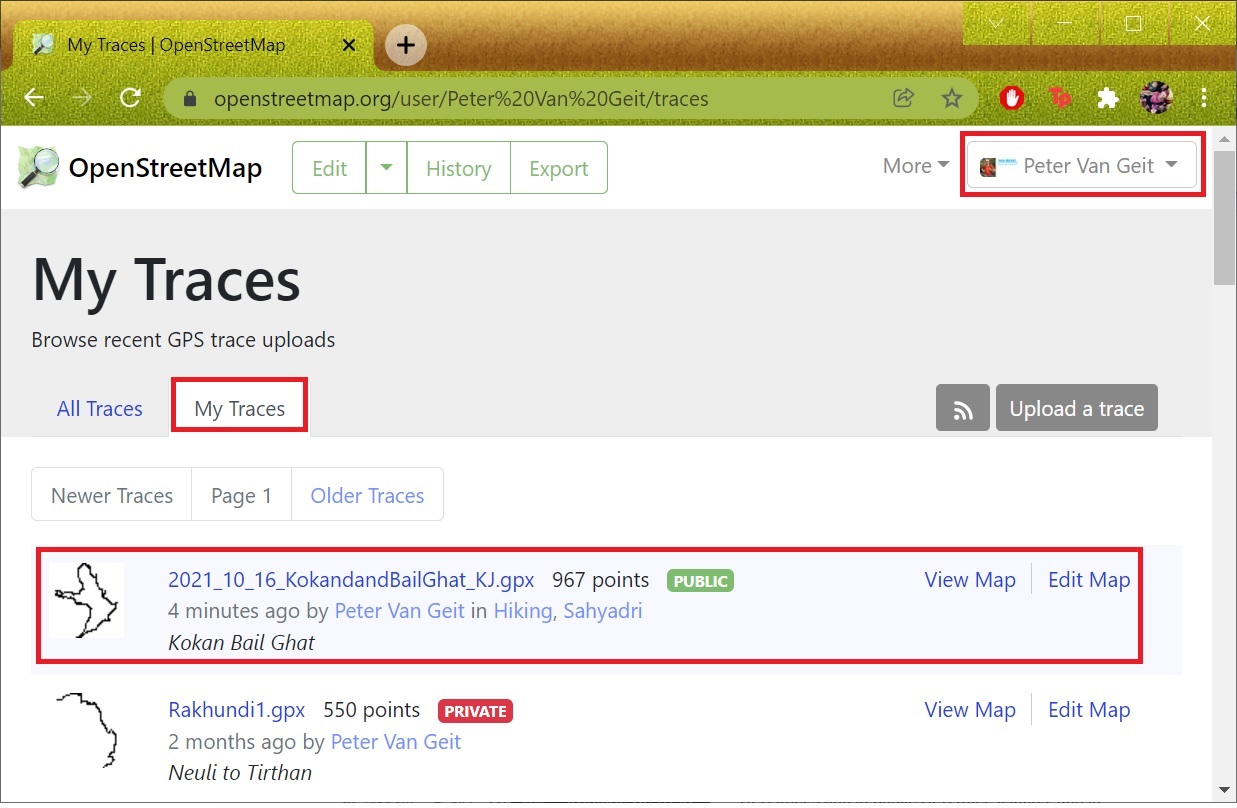
It will take a few minutes for Open Street Maps to validate your GPX files and show them under “My Traces” in your profile on “osm.org“. Invalid GPX files (no proper lat, lon, timestamp) will be rejected. You will receive an email notifying you on the success or failure of the upload. See Image 2 below.
Notes
As mentioned in the previous module 7A, notes are useful comments to assist others in mapping/editing in OSM. Some examples: split in the trail (e.g. one section to be explored later), lake, bridge, river crossing, etc (OSMAnd can only add points, not lines or areas) not yet mapped in OSM.
Whenever you come across something useful that you cannot directly add through OSMAnd (as a POI) or needs further surveying, you can mark the same as a note for future reference. The appropriate OSM object can be mapped later by yourself / others through the OSM web editor.
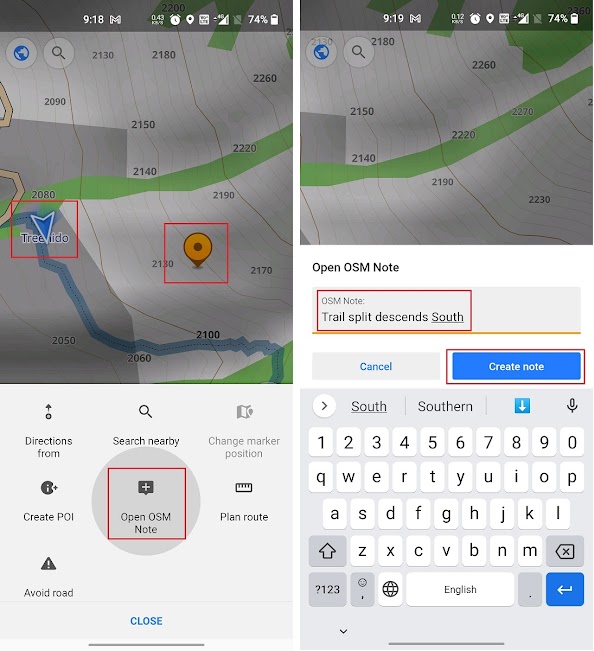
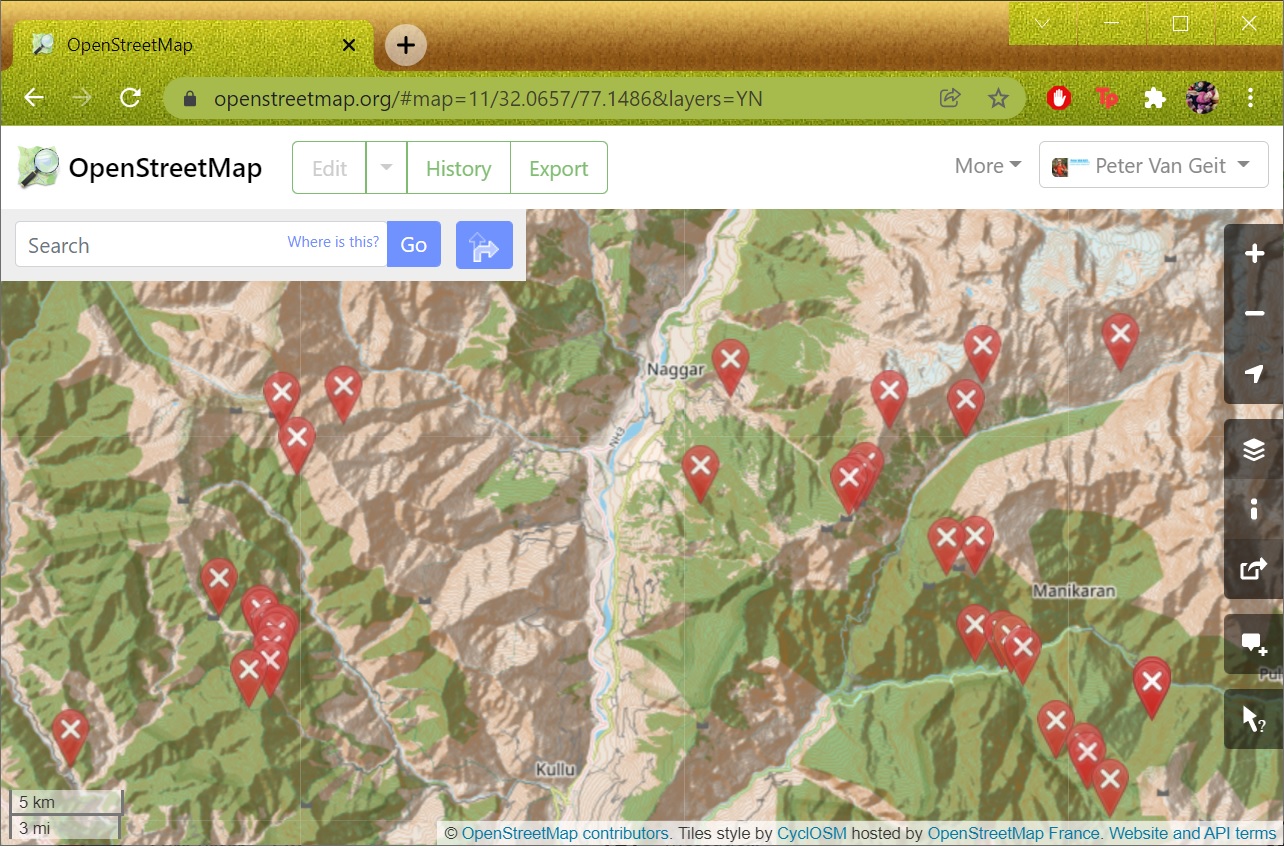
To show existing OSM notes, go to “Configure Map” in main map and enable “OSM notes”. Notes are shown as red X-s on map screen only when connected to the network. To create a note simply click on your current location, chose ” Actions”, “Open OPSM Note” and provide a proper description. Click “Create Note” to add the note offline. See Image 1+2 below.
Local notes are snow as green +-s on the map screen. You can see all newly created notes in “My Places” in the main menu. Once you reach back into network click the “Up arrow” icon in the bottom left corner to upload all Notes to OSM. See Image 3+4 below. The same will be shown under “My Notes” in your profile on “osm.org“
Assignment
In this module you learned how to map simple objects (POIs) in OSM, upload recorded GPS tracks (used for future trail mapping) and notes (to assist in future object mapping) through OSMAnd. It’s time now for some hands-on to acknowledge your understanding of the concepts learned.
As we are dealing with adding objects to the official Open Street Maps database we have to ensure that we add ONLY correct and accurate data. Therefore you will have to do this assignment while out in the mountains (or near your city) while hiking a not yet mapped (non touristic / known) trail.
Alternatively you can create some “test” POIs and Notes in OSMAnd to learn how to do so – but *DO NOT* upload them to the official OSM database (cannot be done unless verified on the ground!). For example: mark all useful features between Bada Gran and Thamsar pass through POIs and OSM notes. You can download, geo-reference Survey map 52D/16 and overlay in OSMAnd to identify lots of interesting features. See Image 1 below.
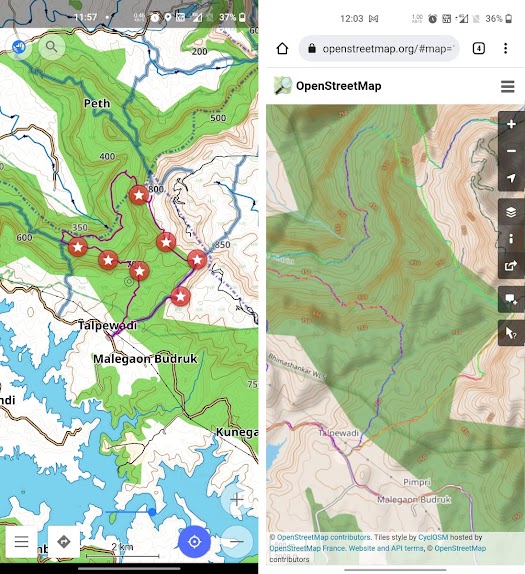
For “Traces” upload a recorded GPS log from a recent hike through OSMAnd as Public Trace. Show the track in both OSMAnd and osm.org after successfully uploading. See Image 2 below.