In Chapter 1 we learned about the Geography of the Western Himalayas, Topography (Contours) and various detailed maps like Open Street Maps, Waymarked Hiking Trails and Survey of India maps to plan a hiking routes. In Chapter 2 we learned about various ways to navigate through the mountains using Mobile GPS, Geo-referenced maps, GPS logs, reference maps, contours and compass.
Now that you are familiar with planning and navigating your route, let’s take a look at various other important aspects to plan your journey:
Module 1 – Elevation profile
Module 2 – Acclimatization
Module 3 – Weather
Module 4 – Seasons
Module 5 – Food planning
Module 6 – Hydration
Module 7 – Night stay
Hiking route refers to the physical path across the mountains. Hiking journey refers to the timeline – duration, day-wise schedule, night halts, food ration, logistics, etc.
Hiking Route
One important aspect of planning your multi-day journey is identifying your night halts. The pace / duration of your hike depends on many factors like – distance, speed (fitness level), elevation gain, terrain difficulty, trail visibility, season, weather conditions, etc. In this chapter we will be taking a closer look at the elevation profile of your hike.
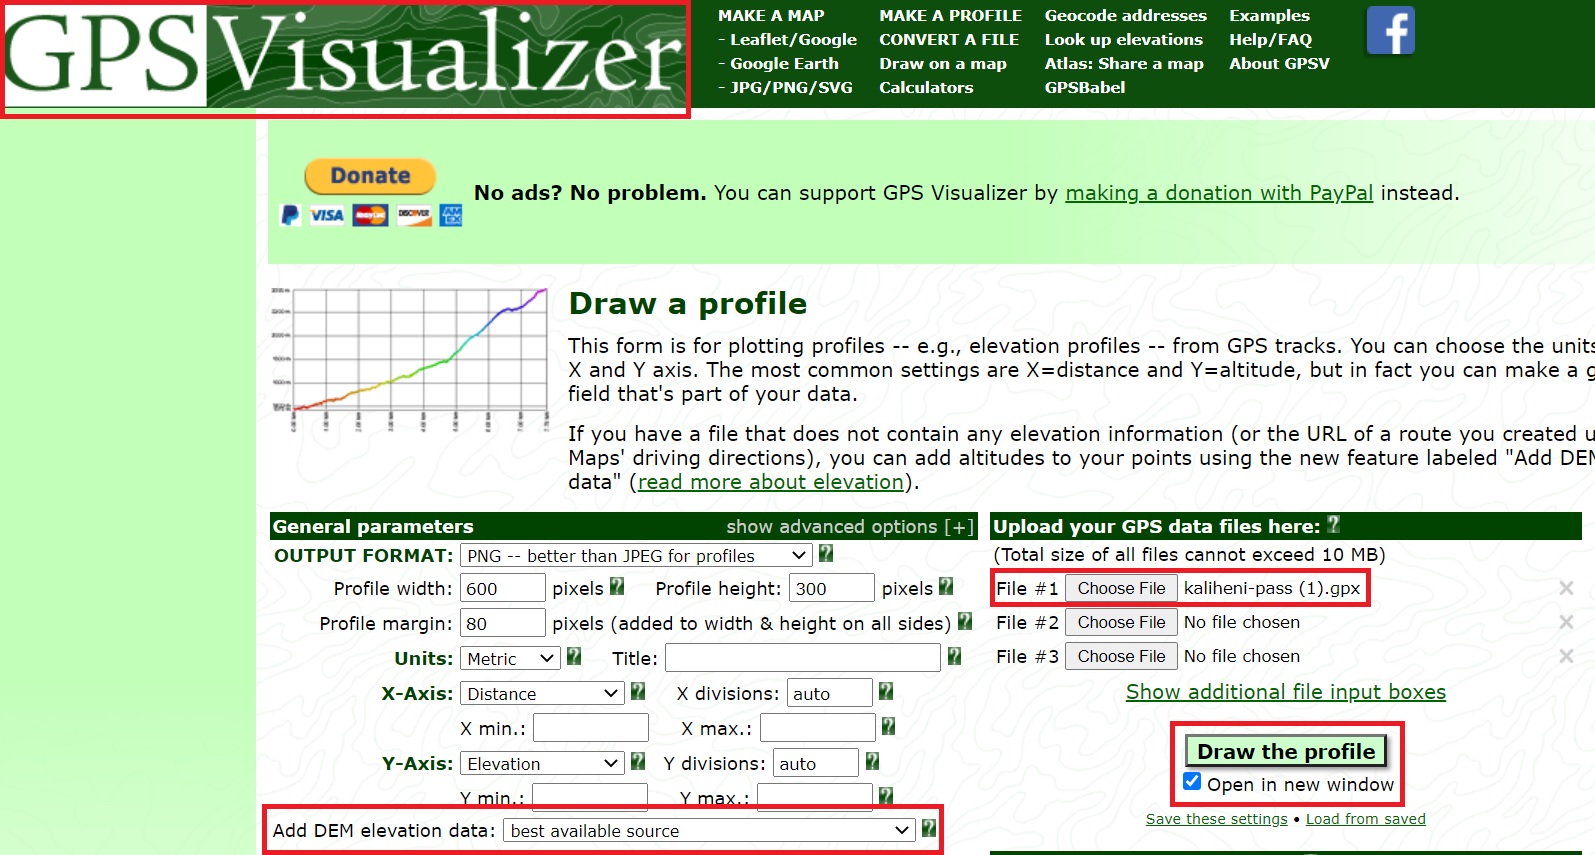
Let’s take a practical example. Open “Waymarked Hiking Trails”, search for “Kaliheni pass” and download the GPS log:
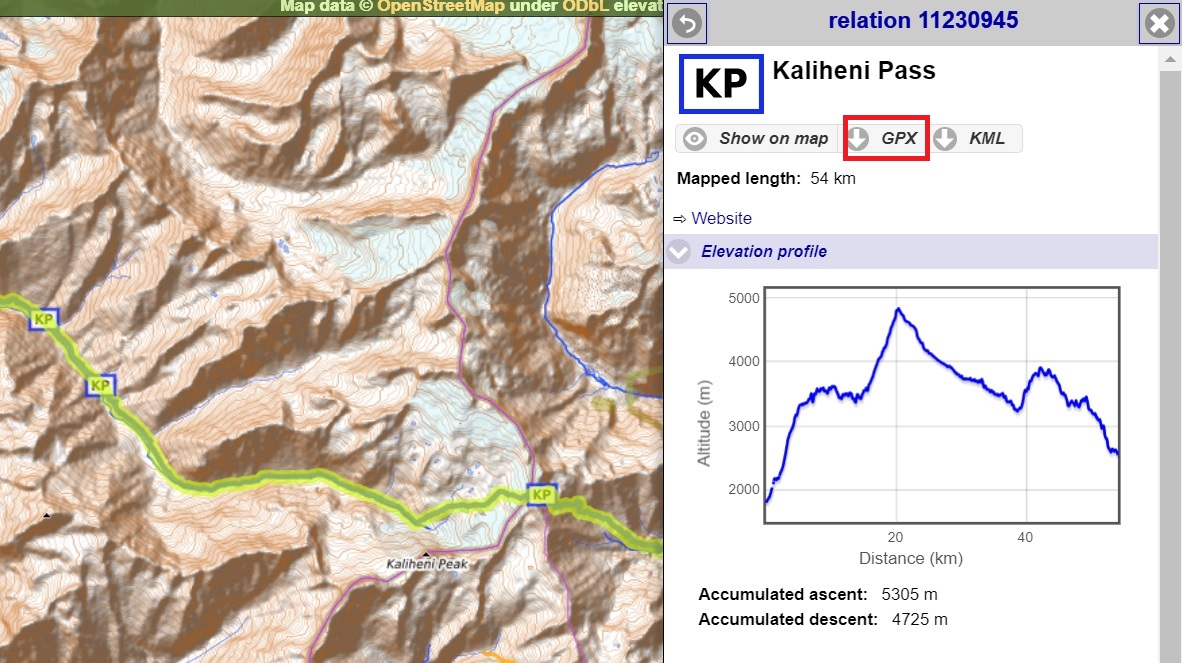
Elevation data
The GPX files downloaded from WHT do NOT contain elevation data. We can easily add altitude information through “gpsvisualizer.com” through the option “Add DEM elevation data”. This will add altitude information to your route and draw an elevation profile.
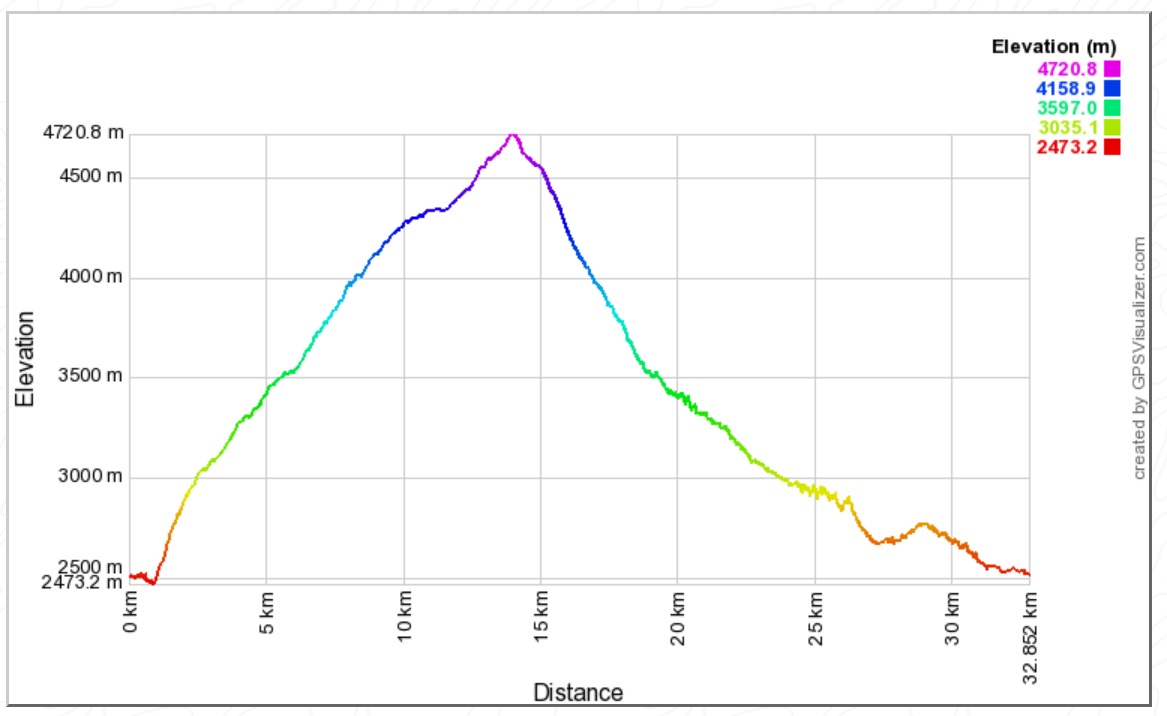
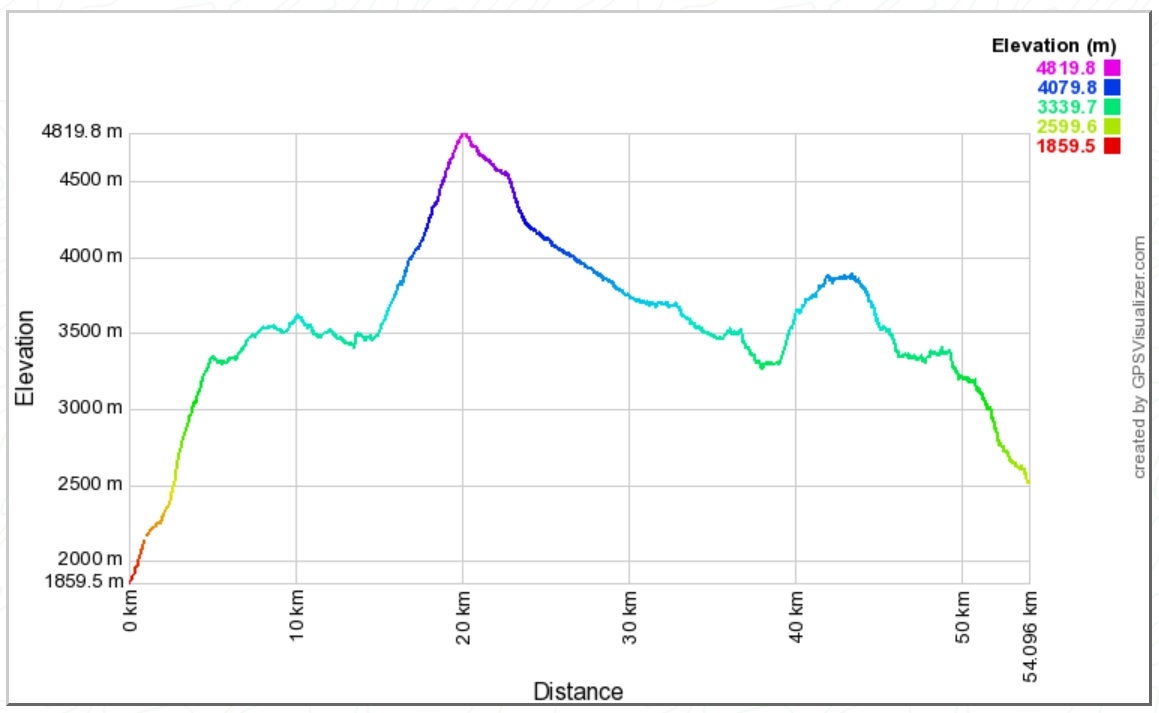
Elevation Profile
The elevation profile shows us the change in altitude (Y-axis) along the entire route / distance (X-axis). This gives us excellent insight in the ascent / descent / steepness along the route and helps us in planning our journey. In the mountains elevation gain is more important towards progress then horizontal distance.
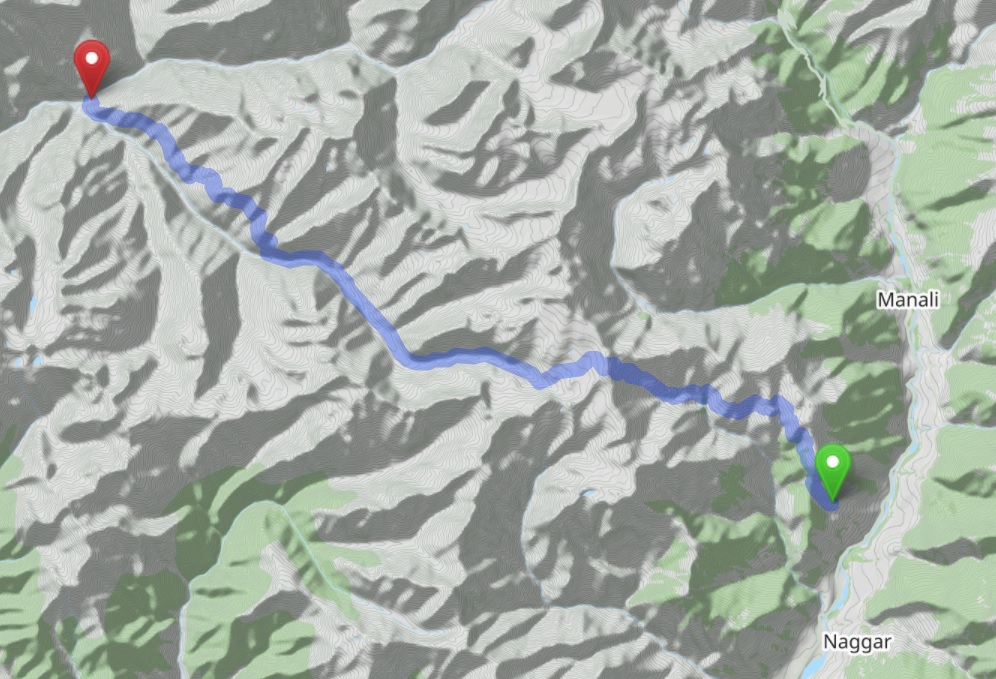
The Kaliheni trek is around 54km from Palgan in the Kullu valley to Bara Bhanghal in the Ravi river valley. If this was in the plains we could simply walk for 3 days covering 18km every day. In the mountains however our pace / progress is mainly determined by the steepness of the route. Sections with high elevation gain will take significantly longer than those where the trail proceeds gradual / follows the contours. Also, the higher the absolute altitude (3000, 4000, 5000m) the lesser oxygen and the higher the effort to move forward.
Campsites
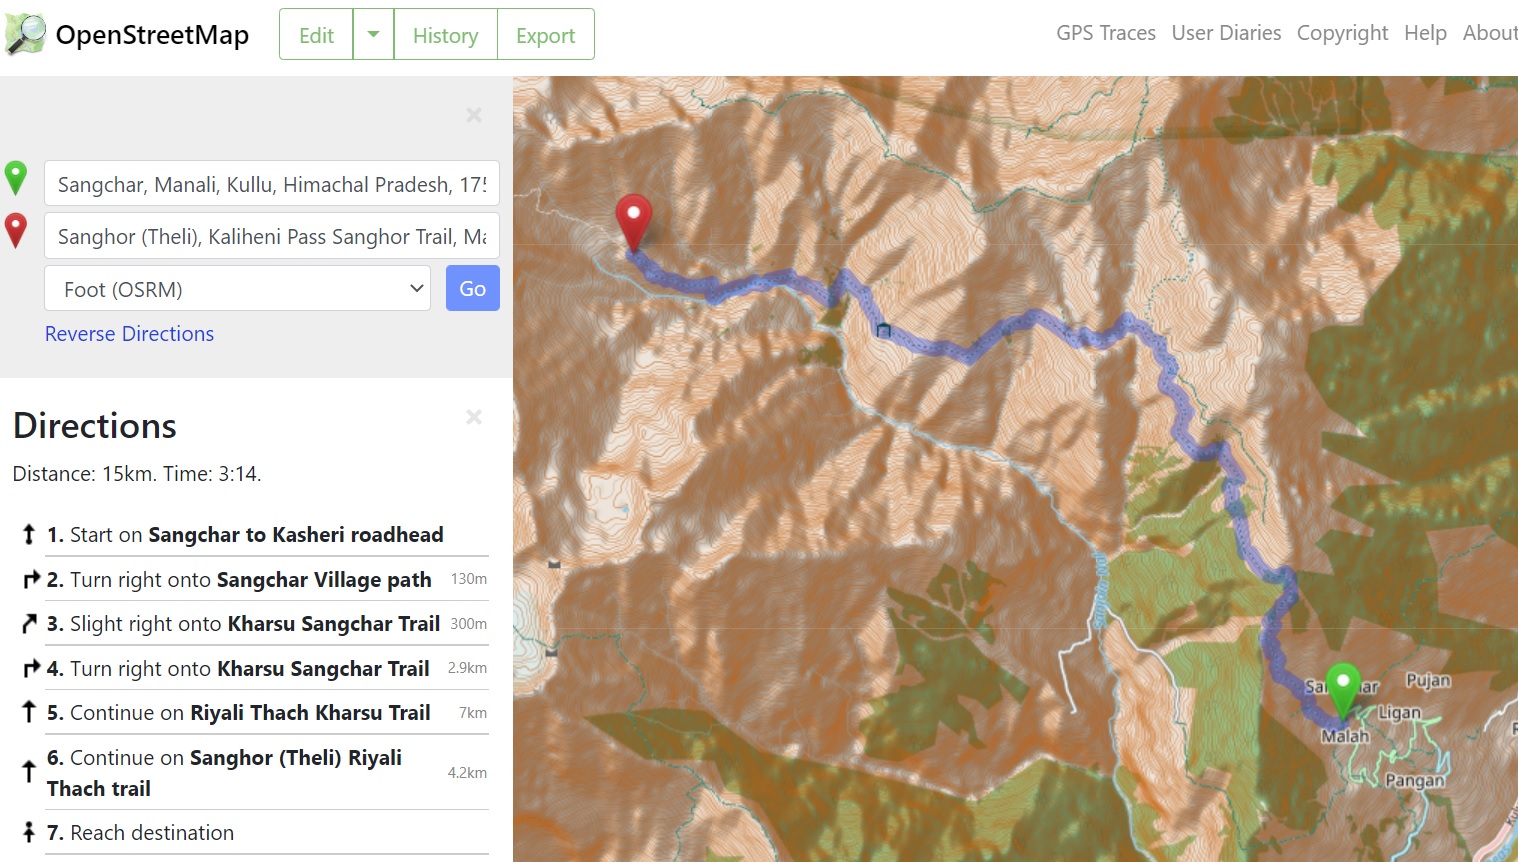
For planning our night halts we need to identify proper campsites along the route. A campsite is usually defined as flat space where we can pitch up our tents (or a pre-existing shelter) with nearby drinkable water (stream). Use the Routing facility in OSM (osm.org) we can identify the distance to each campsite:
Night halts
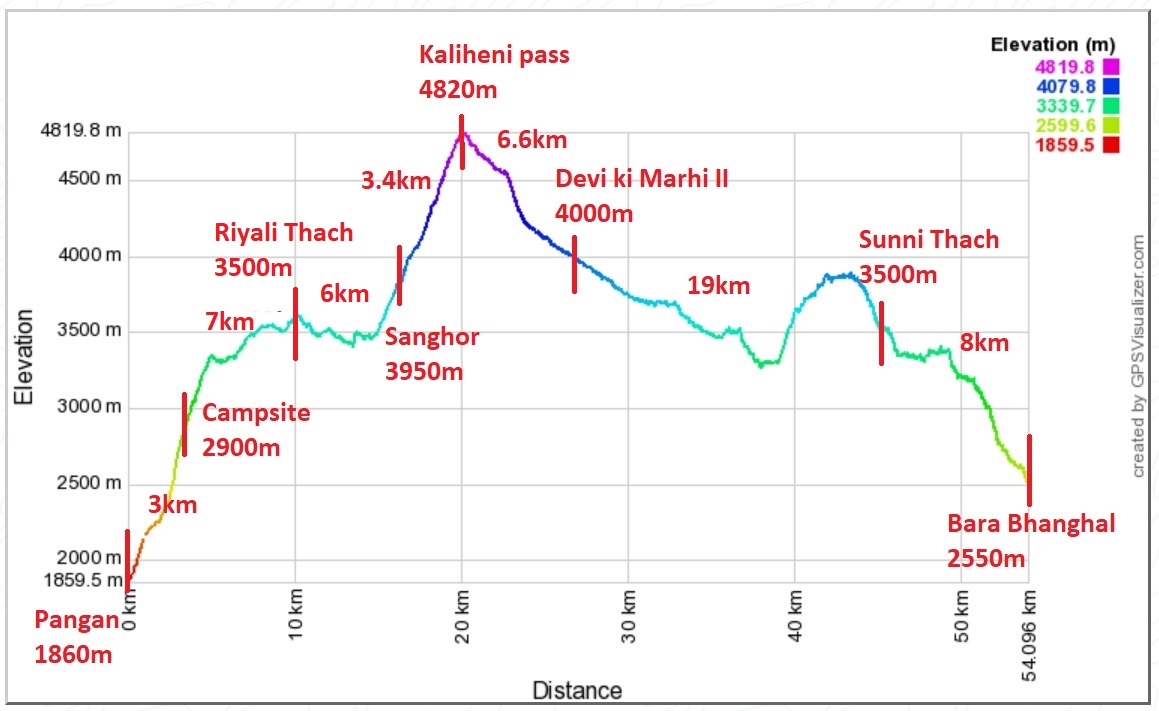
Now that we know the (1) available campsites and (2) distance to each site we can combine this with the (3) elevation gain to identify suitable night halts for our multi-day hike. One meaningful journey for an average hiker (average fitness) would be something like:
Day 1
Pangan – 1860m
Campsite 2900m
A short 3km hike but lot of elevation gain 1040m which would be a significant effort for the fresh hiker
An altitude of 2900m provides proper acclimatization before proceeding higher
Day 2
Riyali Thach 3500m
A short 7km hike with moderate gain 600m
Fit hikers can possibly skip this site and proceed to the next one
Freshers should take it easy for proper acclimatization (500m per day above 3000m)
Day 3
Sanghor 3950m
A short 6km hike with moderate gain 450m
Staying at 3950m acclimatizes us properly for the 4820m pass cross the next day
Day 4
Kaliheni pass 4820m
A short 3km but steep ascent to the pass with nearly 900m elevation gain
Start early morning to cross the pass in a clear / stable weather window
Descend 6.6km to Devi ki Marhi II shelter 4000m
Good to drop down 800m to stay at lower altitude (warmer, more oxygen)
Day 5
Longer traverse 19km
Initial gradual downhill (fast) for 12km
After that a steep 600m elevation gain and drop to
Sunni Thach at 3500m
Day 6
Half day short hike 8km to Bara Bhanghal
1000m elevation drop
As you can see planning the journey for a multi-day hike across a high pass requires to look at various aspects: distance, available campsites, elevation gain, absolute altitude (acclimatization), timing of pass crossing (weather).
Assignment
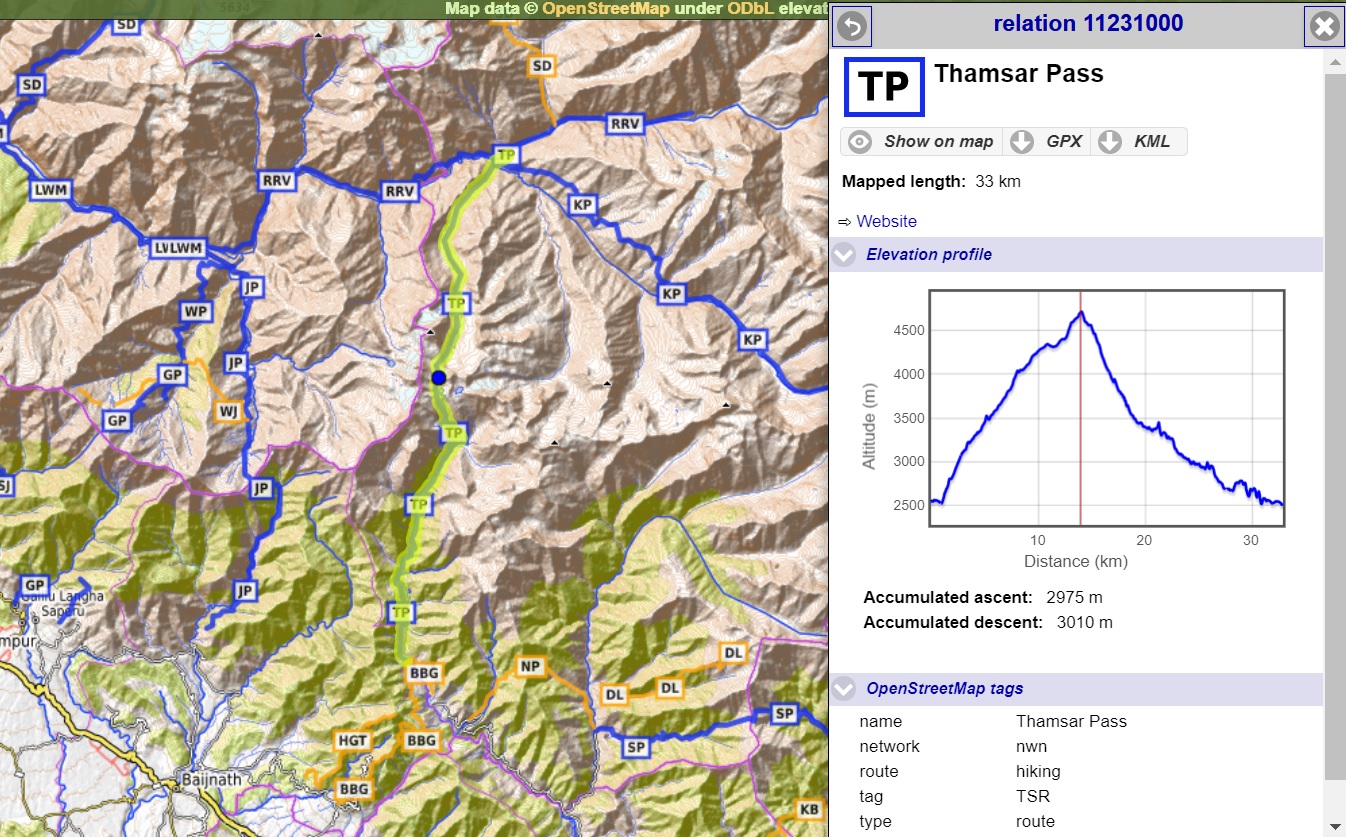
Time for hands-on! Practice makes perfect! Open Waymarked Hiking Trails, search for the “Thamsar pass”, download the GPS log, generate an elevation profile, identify available campsites and propose a probably multi-day journey across the pass from Bada Gran in the Uhl river valley to Bara Bhanghal in the Ravi river valley. Submit your journey + link to an annotated elevation profile showing the night stops (distance, elevation) for review.